

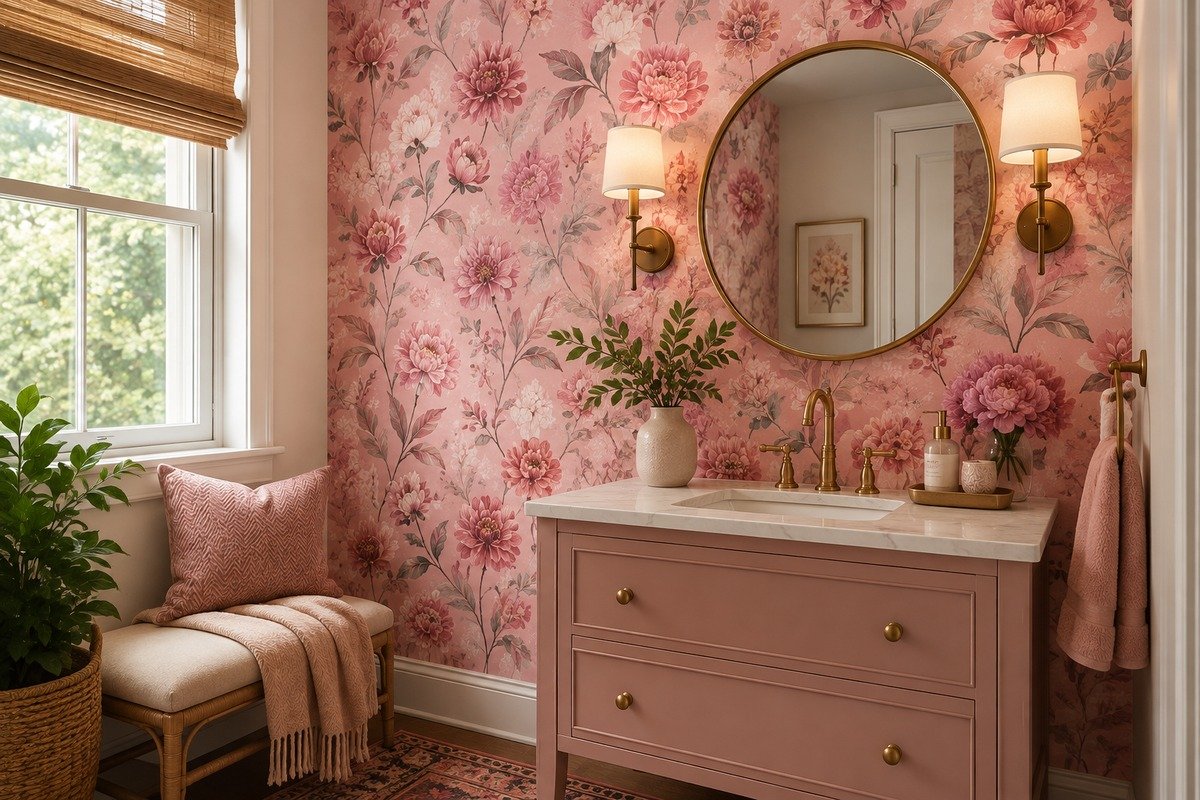
A client once asked me about pink peel and stick wallpaper, and I assumed — wrongly — that she wanted something quiet and forgettable. Nope. She wanted a wall people would stop talking mid-sentence for. Bold, without the paint sprayer, without sacrificing an entire weekend to fumes and drop cloths — that’s roughly the pitch behind pink peel and stick wallpaper these days.
Forty-ish rolls later, spread across nurseries, powder rooms, and one closet project I probably overcommitted to, the surprises haven’t stopped. Some good (“why hadn’t I tried this years ago”), some not (“measure twice, genius”). Either way, this deserves an unvarnished walkthrough, removable wallpaper quirks included, minus the sales-pitch gloss.
Why Pink Peel and Stick Wallpaper Keeps Winning
Pink used to make people nervous. Homeowners circled it warily, worried it’d look childish or age badly within a few seasons. Somewhere along the way, that changed — this material showed up, and pink stopped being a life sentence and turned into an experiment you could actually walk back.
Saturday morning, up it goes. Hate it Sunday? Off it comes, patch a couple spots, repaint if needed. Low stakes, basically — and that’s exactly why nervous clients keep saying yes to colors they’d never dream of trusting to a paint can.
Texture matters too, more than photos let on. Decent-grade self-adhesive vinyl carries a faint tooth to it, neither glossy nor dead flat, and under lamplight a blush or rose shade nearly glows. The cheap stuff, though? Looks like an oversized sticker. Spotting the difference isn’t hard once you know what to check for — more on that shortly.
Shades I Actually Recommend
Pinks don’t all behave the same once they hit a wall, and that catches people off guard constantly. Dusty rose and Barbie-bright fuchsia sit on the same color family tree, technically, yet feel like distant relatives who barely speak.
Here’s roughly the sorting system I run through whenever a client slides a mood board across the table muttering “pink, but not too pink.”
| Shade | Mood It Sets | Rooms Where It Shines |
| Blush / nude pink | Understated, grown, quietly confident | Bedrooms, home offices, hallways |
| Dusty rose | Warm, a touch vintage, moody around the edges | Dining rooms, reading nooks |
| Millennial pink | Approachable, camera-ready, trend-forward | Powder rooms, closets, kids’ spaces |
| Hot pink / fuchsia | Loud on purpose, unapologetically playful | Accent walls, laundry rooms, playrooms |
| Mauve-pink | Refined, faintly gray-toned | Living rooms, primary suites |
Turns out the science lines up with instinct here. Softer pinks measurably calm a room down; punchier ones energize without tipping into the aggression red carries. Part of why pink peel and stick wallpaper slots into so many different room types without a fight.
What It Actually Costs
Budget talk usually lands right after shade talk. Fair — nobody enjoys a surprise on the statement.
Ballpark figures, pulled from quotes I’ve written over the last couple of years:
| Wallpaper Tier | Price Range (per roll) | What You’re Paying For |
| Budget vinyl | $15–$30 | Thin, bubble-prone, fine for a renter testing a look |
| Mid-range textured | $30–$55 | Stronger adhesive, cleaner pattern repeat — my go-to recommendation |
| Premium designer | $60–$120+ | Thick vinyl or fabric-backed, seams that nearly vanish, worth it for a real statement wall |
Three to five rolls, give or take, covers an average accent wall depending on height and repeat pattern. Mid-range material lands most jobs somewhere between $150 and $275, before a smoothing tool or spare blades enter the picture.
Against hiring someone for traditional paste-up paper, this route wins on cost almost every time — no labor bill, no paste. Just don’t let a bargain price talk you into the flimsiest roll on the shelf. Thin material tears mid-install more often than people expect, and then you’re buying it twice.
Prepping the Wall the Right Way
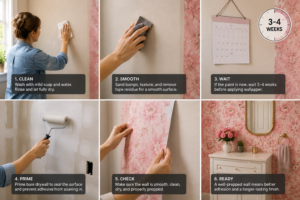
People rush this step constantly, and it’s exactly why so many DIY attempts fall apart within weeks. Adhesion rises or falls on prep work — no shortcuts survive here.
- A mild soap wash, followed by full drying time. Humidity ruins everything downstream.
- Sand away bumps, texture, leftover tape residue — the wall needs genuine smoothness, not “close enough.”
- Fresh paint? Wait it out. Three to four weeks minimum before anything sticky touches it.
- Bare drywall drinks adhesive like a sponge. Prime it first, or watch the paper lift within days.
Curious which brands actually hold up versus which just photograph well? Our top-rated picks sorts that out before you spend a dime.
Prep mistakes trip up more DIYers than bad shade choices ever do — This Old House put together a solid rundown worth a skim before starting, from seasoned renovation experts.
Hanging It Without the Stress
Foolproof, this is not — your first strip will likely go crooked, and that’s genuinely fine. Here’s the rhythm most people settle into:
- Level in hand, draw a plumb line near your starting corner. Eyeballing this step ends badly, every time.
- Peel roughly a foot of backing, tack the top corner, let gravity do some of the aligning for you.
- Work downward in slow overlapping strokes, chasing bubbles outward rather than toward the center.
- Baseboard and ceiling line get trimmed with a fresh blade — dull ones tear instead of cutting clean.
- Next strip overlaps slightly; match the pattern before committing to pressure.
Seam trouble on a particular roll? Full application walkthrough covers seam-matching tricks that spare you a lot of muttered frustration. Prefer watching before doing? Home Depot’s step-by-step hanging guide walks through marking, cutting, and hanging that first panel in genuinely plain language.
Pink Peel and Stick Wallpaper vs. Traditional Paper
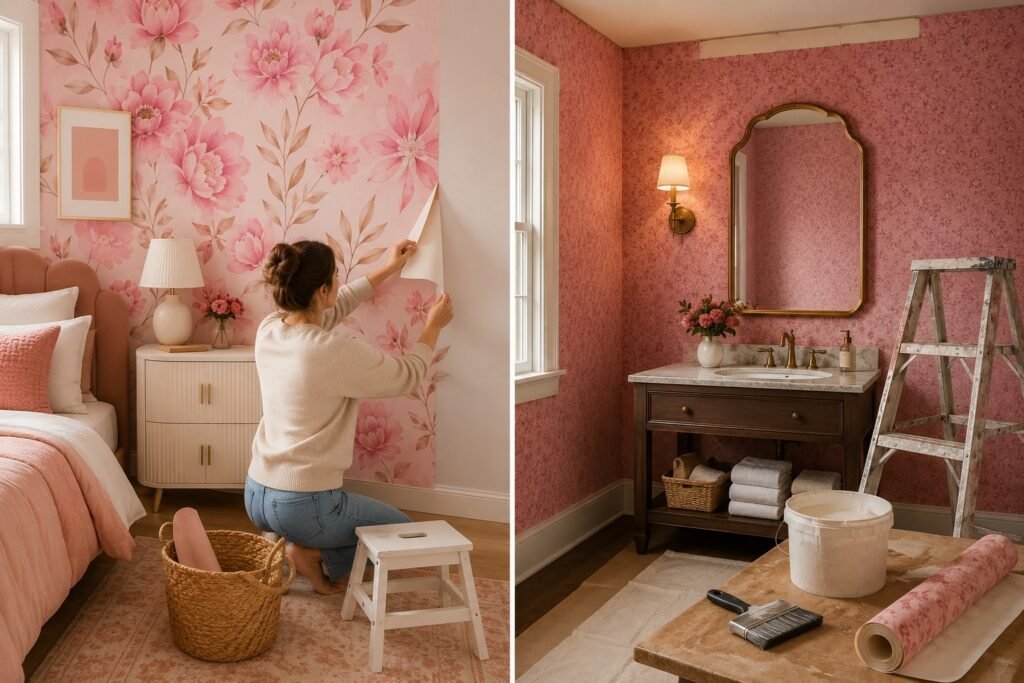
Assumption people make constantly: peel-and-stick is just lazy wallpaper. Wrong assumption — it’s a fundamentally different product, tradeoffs and all.
Paste, patience, likely a professional — that’s the traditional route, and it lasts decades if done right. Committing a bright pink pattern to twenty years, though, is a wildly different decision than committing it to two.
Flexibility replaces some of that longevity here. Swap it with the seasons, with a kid’s shifting tastes, with your own mood on a random Tuesday. Weighing both seriously? Classic paste option lays out exactly where each format pulls ahead.
Where This Pink Wallpaper Really Shines
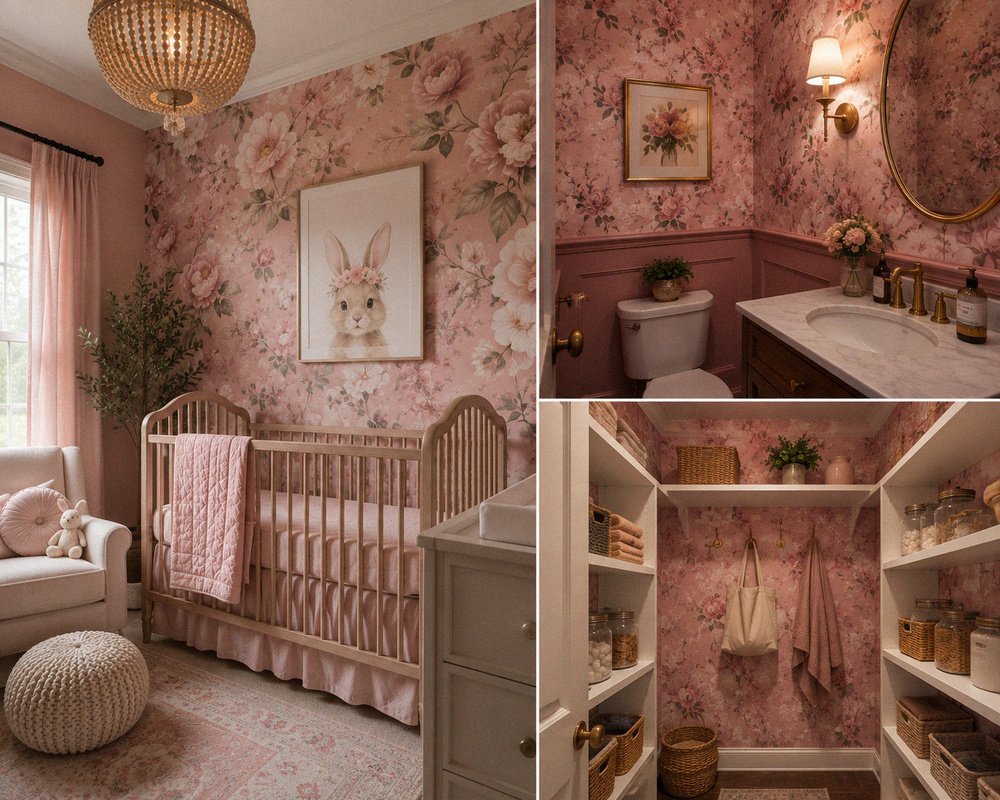
Not every room wants pink slapped across it, obviously — nobody’s forcing fuchsia into a kitchen against its will. Certain spots practically beg for it, though.
Nurseries, sure, the obvious pick. Powder rooms deserve more credit than they get, honestly — small, low-traffic, the safest room in the house to gamble big, since you’re never staring at that wall for hours the way a bedroom demands.
Closets and pantries? Sleeper favorites. Nobody but you opens that door, so why not turn a mundane errand into a tiny daily moment? My own linen closet went dusty rose two years back, and somehow grabbing a towel still gets me a small smile.
Patterns Beyond Solid Blush
Solid color hogs the spotlight, but some of my favorite jobs lean hard into pattern instead. A subtle grasscloth-textured dusty rose reads considerably pricier than its tag suggests, and it camouflages minor wall flaws better than any flat solid manages.
Florals are circling back into fashion, though smaller-scale prints are the safer bet unless the wall genuinely has room to spare. Oversized peonies on a cramped powder-room wall can shrink the space visually — rarely the goal.
Geometric shapes work differently — scallops, arches, gentle waves — pairing beautifully with pink because shape carries the visual weight while color stays soft. Reads intentional, not accidental, which matters a surprising amount when a skeptical partner needs convincing about a bold wall.
Terrazzo and stone-look prints in blush tones keep appearing in my recent quotes too, mostly kitchens and bathrooms chasing texture without actual stone-tile pricing.
Tools You’ll Actually Need
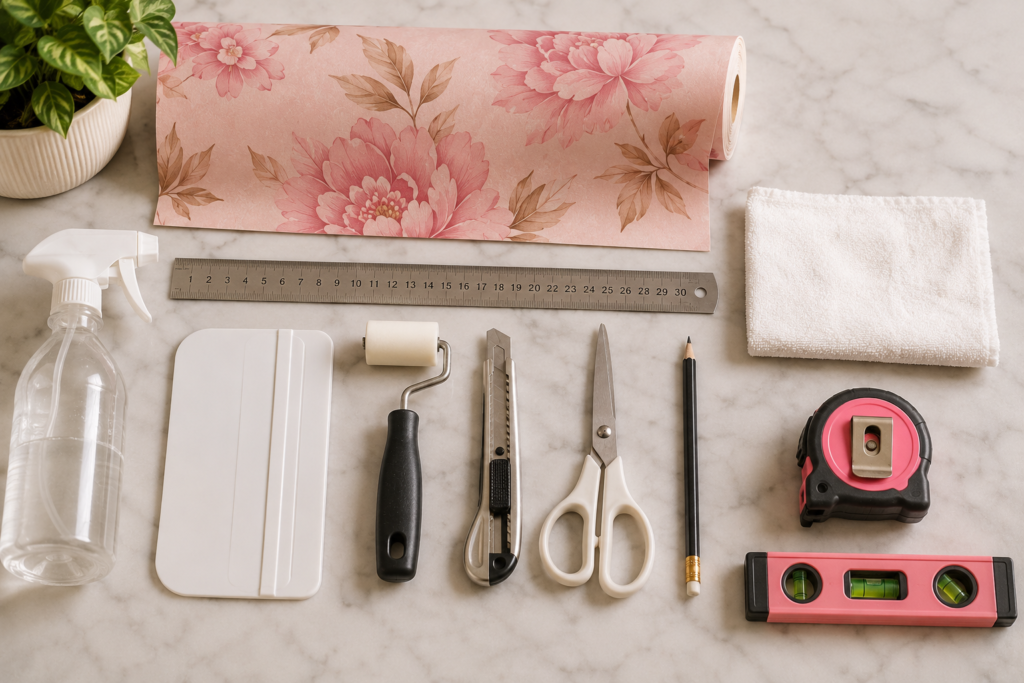
Nothing on this list requires a trip to a specialty store, which is honestly half the appeal of the whole project. Still, showing up unprepared turns a two-hour job into a frustrating half-day one.
A smoothing tool tops the list — plastic, not metal, since metal edges can scratch or crease cheaper vinyl. A sharp utility knife matters more than people expect; a dull blade drags and tears instead of slicing clean through a strip. Keep a few spare blades on hand, because one panel is usually enough to dull an edge noticeably.
A four-foot level beats a phone app every time for that first plumb line — apps drift, physical levels don’t. Add a tape measure, a pencil for light marking, and a stepstool if the wall runs past standard ceiling height. A squeegee works fine in place of a dedicated smoother if that’s what’s sitting in a kitchen drawer already; plenty of people manage with an old gift card in a pinch, honestly.
One extra item that surprises first-timers: a clean, dry rag. Dust and grime hiding in wall texture sabotage adhesion just as badly as skipping the wash step entirely, so wiping down right before hanging each strip catches anything missed earlier in the prep process.
Renting? Read This First
Renters ask about this constantly, understandably so. Most peel and stick material qualifies as landlord-safe, provided the wall underneath gets treated gently during removal — slow, low-angle peeling protects the paint layer beneath it.
Still, a quick test patch in a closet or behind furniture saves headaches down the line. Older paint jobs, especially anything applied more than a decade ago, sometimes lift more stubbornly than newer coats. Testing a small section first, rather than committing to a full accent wall blind, catches that problem before it becomes a security-deposit conversation.
Some property managers request photo documentation of the original wall color before any changes happen. Worth doing regardless of whether it’s required, honestly — cheap insurance against a dispute nobody wants to have at move-out time.
Common Mistakes to Skip
A handful of patterns repeat across nearly every botched install I’ve been called in to fix:
- Skipping the plumb line. Walls are rarely straight; eyeballing guarantees a crooked pattern by strip four.
- Rushing paint cure time. Adhesive loses that fight against uncured paint, no exceptions.
- Ordering too few rolls. Pattern repeat eats material fast — order 10–15% extra, always.
- Pressing too hard, too early. Peel and stick repositions multiple times; use that flexibility.
- Underestimating humidity. Bathrooms and kitchens need genuine ventilation attention, or seams lift within a season.
- Skipping fixtures prep. Power off first, always — trim carefully around switches instead of stretching paper to fit.
- Mixing production batches. Dye lots from different runs shift subtly in color, and that shift shows once panels sit side by side.
None of these mistakes wreck a job alone. Stack two or three together, though, and the finished wall looks noticeably worse than the sample photo promised. Slowing down at prep genuinely prevents most of the headache.
Pink or Black — Which Fits Your Room?
Too much of a leap, pink? Sometimes I point clients toward the opposite extreme first, just to compare. Moody, dramatic walls draw their own crowd, and seeing both ends side by side clarifies things fast.
Moodier dark alternative covers the black options for anyone chasing contrast over warmth — useful context even if pink wins in the end, since it sharpens what mood you’re actually after.
Keeping It Looking Good Over Time
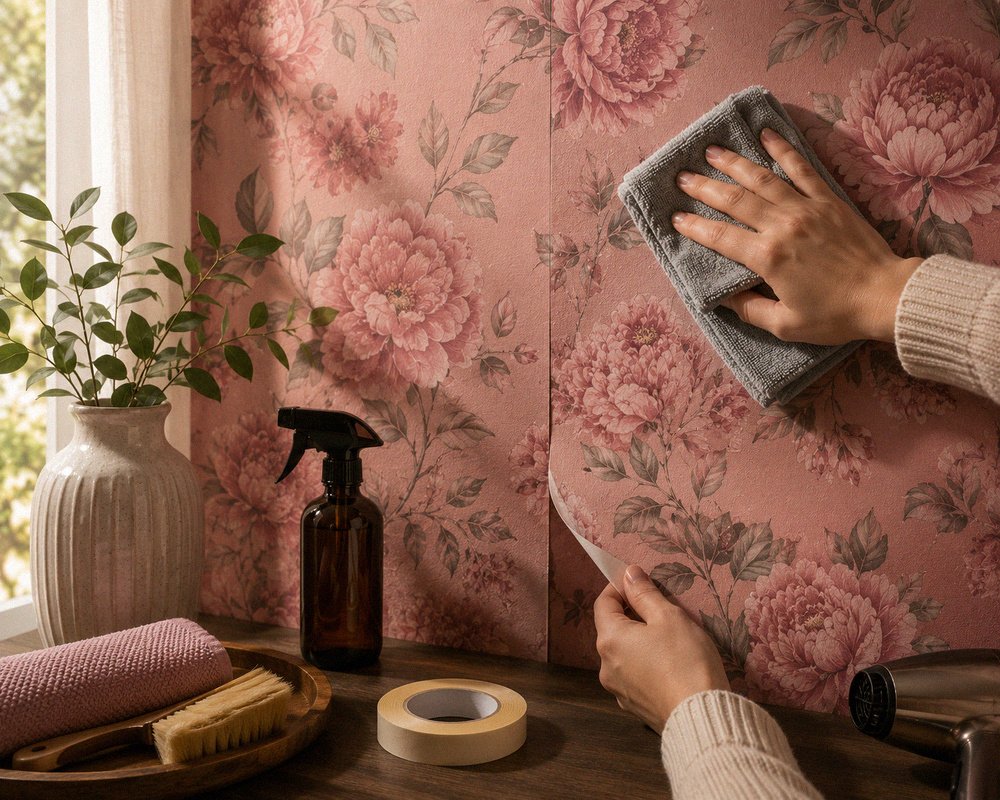
Maintenance stays refreshingly light, honestly half the reason I push this material toward busy clients. A barely-damp microfiber cloth handles cleaning — nothing abrasive, nothing soaked through. Steam near seams is the real threat; trapped moisture curls edges over time.
Corner lifting months down the road? Low-heat hairdryer softens the adhesive enough for repositioning. Double-sided tape rescues a stubborn edge in a pinch, though call it a patch job, not a fix.
Sun exposure works slower but just as surely. Years of direct afternoon light fade a wall unevenly, window-adjacent spots worst of all — a sheer curtain or UV film buys extra years if consistency matters to you. Small step, meaningful payoff.
Seasonal temperature swings stress seams too, more than most homeowners realize. Dry winters into humid summers means the wall itself expands and contracts, subtly. Running a hand along seams every few months catches lifting corners early — five minutes, tops, and it beats discovering a full reapplication job later.
FAQs
Does pink peel and stick wallpaper damage walls when removed?
Rarely, assuming the paint underneath cured fully before installation and removal happens slowly, at a low angle — rushing the peel is what drags paint along with it.
How long does this type of wallpaper actually last?
Two to five years of solid performance in typical rooms, less in steamy bathrooms, considerably more in low-traffic spots like closets that never see direct sun or shower steam.
Can I layer it over existing wallpaper?
Not a great idea. Adhesive struggles bonding to another papered surface, and any bubbling underneath telegraphs straight through the new layer within weeks.
Is this wallpaper safe for a nursery?
Most trustworthy brands run low-VOC and washable, though checking the specific listing before ordering matters — certifications vary more than people assume across manufacturers and price points.
Will the color fade in direct sunlight?
Cheap vinyl noticeably fades within a year or two under strong sun; better material resists far longer, so checking UV ratings pays off if your wall catches heavy afternoon light.
Do I need special tools to install it myself?
A smoothing tool, level, sharp utility blade, tape measure — that covers nearly every job. Nothing exotic, nothing expensive, most of it borrowable or under thirty dollars combined.
Can it go in a bathroom?
Yes, provided ventilation actually works — a functioning exhaust fan running during and after showers — and it stays clear of direct shower splash zones.
How many rolls do I need for one accent wall?
Three to five, typically, though ceiling height and pattern repeat can push that higher. Measure twice, order a touch extra, before checkout.
Wrapping Up
Made it this far? You’re probably past “is this even worth doing” and into “okay, which shade” — the genuinely fun part. Pink peel and stick wallpaper earns its reputation fairly: forgiving, fast, and it lets you gamble on a bold color minus the decades-long commitment traditional wallpaper used to demand.
Still, one boring truth deserves repeating: prep outranks shade selection every time. A gorgeous blush roll on a poorly primed wall disappoints within a month. A mid-range roll on properly prepped drywall, meanwhile, holds up for years. Spend the patience on the wall itself, not just the wallpaper you picked.
Choose color based on how a room actually functions day to day, not just how it photographs for someone else’s feed. Softness suits a nursery in ways a busy hallway can’t absorb. Drama suits a powder room in ways a primary bedroom might resist facing every single morning. Match the pink’s mood to the room’s actual mood, and the odds of regret drop sharply.
Permanence shouldn’t weigh too heavily on the decision, either — that’s the entire point of this material existing. Stop loving a shade in a year or two? Pull it down some slow Sunday, try something new. Few home upgrades hand you that kind of low-risk experimentation, and more people ought to lean into it rather than assuming every big change demands a lifetime commitment. Growing tired of pink peel and stick wallpaper was never really the risk here; it was built to shift alongside you, one removable strip at a time.