

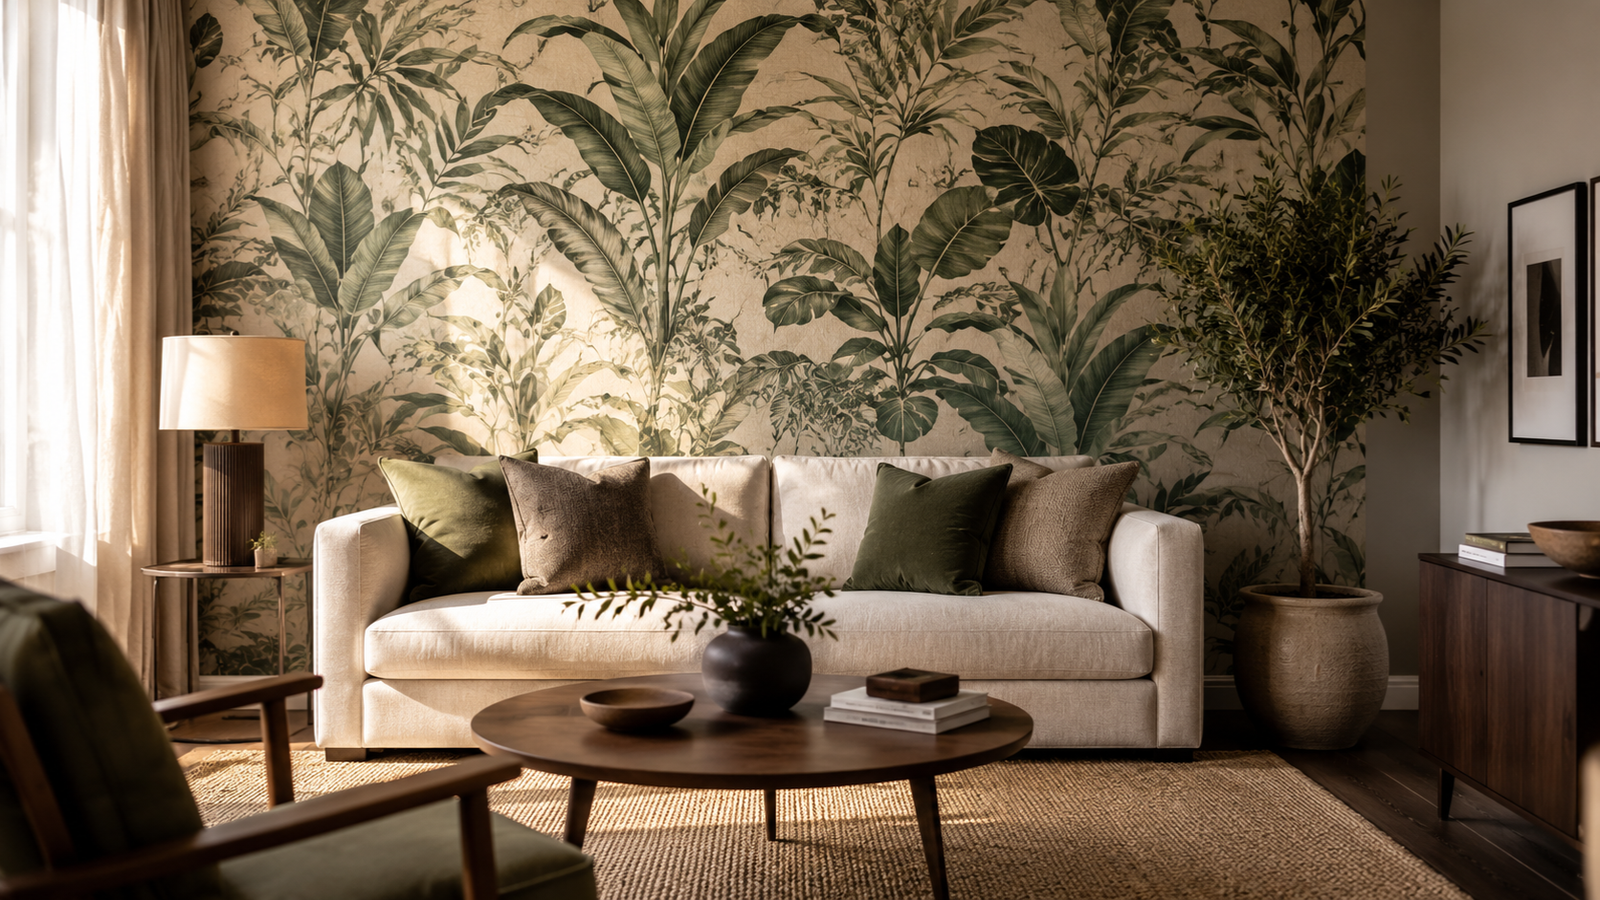
Confused about a wallpaper accent wall living room upgrade? Here’s the real comparison of styles, costs, and mistakes people actually make. Most people think a wallpaper accent wall living room project is just “pick a pretty pattern and slap it on the wall.” It’s not.
That misconception is exactly why so many DIY attempts end up peeling at the corners within a year, or worse, looking completely wrong for the room the moment the furniture goes back in front of it. The pattern is maybe 20% of the decision. The rest is wall type, room light, and picking the right material for how that specific wall actually gets used day to day.
I’ve installed, removed, and redone enough of these walls to know the difference between a project that photographs well for six months and one that still looks sharp five years later. So this isn’t a highlight reel of pretty rooms. It’s the practical version — the one that tells you what actually holds up.
What a Wallpaper Accent Wall Living Room Setup Actually Means
One wall, usually the biggest or the most visually prominent one in the room, gets covered in patterned or textured paper. The other three stay a plain, solid color. That’s it. The contrast between busy and plain is what makes the whole thing work — cover every wall and you lose that effect entirely, and the room can start to feel like a wallpaper showroom rather than someone’s living space.
The wall itself matters more than people initially think. Behind the sofa, around a fireplace, or the wall directly facing the main entry are the usual candidates, because those are the walls your eyes land on first. A wall tucked in a corner, or hidden behind a bookshelf, rarely earns its keep as an accent wall no matter how nice the paper looks in the store.
It also helps to think about what a wallpaper accent wall living room design is not trying to do. It’s not meant to compete with your art, your rug, or your lighting fixtures for attention — it’s meant to sit behind all of that as a backdrop with more depth than a flat paint color offers. When a wall tries to do too much, loud pattern plus loud furniture plus loud accessories, the whole room starts to feel visually exhausting rather than intentional. The best versions of this project usually involve restraint somewhere else in the space to let the wall actually breathe.
Comparing the Main Wallpaper Types for This Job
Not every wallpaper material behaves the same way once it’s on a wall people actually live around. Since this decision genuinely comes down to comparing distinct product types, here’s how the common options stack up against each other in real living rooms.
| Wallpaper Type | Typical Cost (per roll) | Durability in a Living Room | Removal Difficulty | Best Suited For |
| Peel-and-stick vinyl | $25–$60 | Moderate; can bubble in humidity | Easy, often residue-free | Renters, first-timers, quick refreshes |
| Traditional pasted paper | $60–$150+ | High; holds up for a decade or more | Hard, often needs steaming | Long-term homeowners, statement walls |
| Grasscloth/natural fiber | $70–$130 | Low tolerance for moisture or wiping | Moderate, can tear drywall paper | Low-traffic walls, texture over pattern |
| Metallic/foil print | $50–$100 | Moderate; shows wall imperfections | Moderate | Smooth, well-prepped walls only |
| Large-scale mural | $80–$250 (full set) | High if vinyl-based | Varies by backing material | Statement walls, high ceilings |
The takeaway from that table isn’t “buy the cheapest option.” It’s that the wall behind your sofa, where heads and hands make contact constantly, needs something closer to vinyl or a well-sealed print, while a low-traffic wall around a fireplace can afford something delicate like grasscloth without much risk. For a fuller decision framework beyond just this comparison table, see our guide on how to choose wallpaper for a living room.
Why This Beats Just Repainting
Paint is the default because it’s familiar, not because it’s necessarily the better choice. A wallpaper accent wall living room upgrade adds physical texture that flat paint can’t fake — raised embossing, woven grasscloth fiber, the slight sheen shift on a metallic print depending on where you’re standing in the room. None of that comes through with a can of eggshell finish.
There’s also a value angle worth mentioning. Real estate agents I’ve talked to consistently say a tastefully done accent wall photographs better for online listings than an all-white room does, because buyers remember spaces that had some personality, even briefly, while scrolling through dozens of identical listings. And practically, textured or patterned paper hides drywall imperfections — old patched holes, faint seams, minor unevenness — far better than a flat matte paint job does under strong lighting.
Cost comparisons come up a lot too, and they’re worth being honest about. A gallon of quality paint runs somewhere around $40 to $70 and covers roughly 400 square feet, so painting a single wall is genuinely the cheaper option on paper. But paint alone doesn’t add texture, doesn’t hide imperfections the same way, and doesn’t create the same visual depth that catches light differently depending on where someone is standing in the room. You’re not really comparing like-for-like when you put paint and wallpaper side by side — you’re comparing a flat surface change against a textural one, and for a lot of living rooms, that texture is exactly what was missing.
How the Installation Actually Works Start to Finish
Skipping wall prep is the single biggest reason wallpaper fails early, and it’s got nothing to do with the pattern chosen. Walls need to be clean, dry, and free of flaking old paint before anything touches them. A quick wipe-down and a look for bumps or peeling paint takes fifteen minutes and saves months of frustration later.
Measuring comes next, and it’s less obvious than it sounds. Take the exact height and width of the wall, then add roughly 10 to 15% extra to account for pattern matching and trimming waste, since large-repeat prints waste more material lining up the design between strips than plain textures do. The remodeling impact report published by the National Association of Realtors regularly tracks which interior projects homeowners find most satisfying and which ones hold their value best, and smaller cosmetic upgrades like an accent wall tend to score well on that satisfaction side even though the dollar figures are modest compared to a full kitchen remodel.
Lighting genuinely changes how a pattern reads once it’s up. Store lighting is almost never a fair test. Tape a real sample to the actual wall and check it under morning light, afternoon light, and lamp light at night before finalizing an order — colors and even pattern visibility shift more than people expect across those three conditions.
Real Benefits Beyond Looking Nice
A wallpaper accent wall living room decision solves more than a decorating itch. It creates a genuine focal point without needing to buy new furniture or expensive art, which matters if the rest of the budget is already stretched. It’s also more reversible than people assume, especially with peel-and-stick options, since a lot of modern papers come off clean without the multi-coat primer-and-repaint process a bold paint color would require to undo.
It hides daily wear better than plain paint does, which matters in homes with kids or pets where scuffs happen fast. And it adds real warmth to rooms full of hard surfaces — tile floors, glass tables, metal fixtures — where something soft and textured on one wall balances the whole space out in a way a fresh coat of paint alone usually can’t.
Where It Falls Short
I’d rather be upfront about the downsides than let you find them out the hard way. Humidity is the biggest one. Living rooms near open kitchens, or homes without solid climate control, can see edges lift within a year if the adhesive wasn’t rated for that moisture level — this shows up far more with cheap peel-and-stick brands than with quality pasted paper. The EPA’s indoor humidity guidance recommends keeping indoor relative humidity between roughly 30 and 50 percent, and staying within that range does double duty — it protects wallpaper adhesive from failing early and keeps the air in the room more comfortable overall.
Bold, trend-driven patterns date faster than a neutral paint color does. Something that feels fresh today can look dated in five years the way certain mid-2010s geometric prints do now. If resale value down the line matters to you, lean toward classic textures — subtle botanicals, simple stripes, grasscloth — over anything too tied to a specific design moment.
It’s also genuinely harder to remove than most people expect, particularly older traditional paper hung with strong adhesive decades ago. And large-repeat patterns punish mistakes visibly — a strip hung even half an inch off throws the whole wall’s alignment out, which is exactly the kind of error that’s obvious once the wall is finished and much harder to fix after the fact.
Step-by-Step Installation Guide
- Choose the wall first. Notice where your eyes land walking into the room — that’s usually the wall behind the sofa, around the fireplace, or facing the entry.
- Measure the space precisely. Get exact height and width, then order 10-15% extra for pattern repeats and trimming.
- Prep thoroughly. Clean dust, patch holes, sand rough spots, let everything dry fully before touching adhesive to the wall.
- Prime if the wall needs it, especially over dark paint or a previously glossy finish, so the new adhesive actually bonds.
- Dry-fit the first strip against the wall before committing, checking pattern alignment from the most visible corner.
- Hang top to bottom, smoothing bubbles outward with a proper smoothing tool rather than your hand.
- Trim the excess cleanly at the ceiling line and baseboard using a sharp blade.
- Let it cure for the time the manufacturer recommends before pushing furniture back against the wall.
A Few Real Rooms Worth Describing
A small apartment living room with almost no natural light felt cave-like no matter the paint color we tried. We used a warm terracotta botanical print on the wall facing the window, and the reflected warmth actually brightened the entire room in a way white paint never managed.
A family with two young kids and a dog worried constantly about staining. We chose a darker, textured vinyl print for the wall behind their TV, a high-traffic wall visually but one nobody actually touches with sticky hands, and three years later it still looks brand new. If the TV wall is your focal point, our living room TV wall ideas guide has more directions for that specific setup.
One bachelor pad wanted real drama without full commitment. We used a large-scale mural of a moody forest scene behind a leather sectional, and left everything else in the room deliberately plain so the mural could carry the entire personality of the space on its own.
A newly married couple renovating their first house had a tight budget and a living room that opened straight into the kitchen, which made them nervous about grease and cooking smells settling into anything too delicate. We used a removable peel-and-stick paper with a subtle linen-texture print, closer to fabric than obvious pattern, on the wall behind their television. It gave them texture without the commitment of traditional paste, and when they moved two years later, it peeled off clean with barely any residue left behind on the drywall.
A home office that doubled as a reading nook in the evenings presented a different kind of challenge. The client wanted something calm enough for focused work during the day but with more personality once the lamps came on at night. We landed on a muted botanical print in charcoal and cream, which read almost neutral under daylight but picked up noticeably more warmth and contrast once evening lighting took over. Details like that — how a wallpaper accent wall living room design shifts appearance across different times of day — are exactly the kind of thing worth testing with a sample before committing to a full order.
Expert Tips That Actually Hold Up
Always order a sample before committing to a full run — patterns and colors shift more than expected once scaled up to an entire wall.
Check the sheen of your ceiling and trim paint against the wallpaper’s finish. A glossy white ceiling paired with a matte, heavily textured paper can look mismatched in a way that’s hard to name but easy to spot once someone points it out.
Plan the pattern layout around windows or doors before hanging the first strip. Centering a bold motif awkwardly next to a doorframe is a mistake you genuinely can’t unsee once it’s finished.
I’ve seen this trip people up constantly: picking a print from a tiny thumbnail online, then being stunned by how enormous the repeat looks once it covers a full wall. Always check the listed pattern repeat measurement, not the preview image.
Match the paper’s undertone to your existing furniture, not just to the paint on the surrounding walls. A wallpaper accent wall living room design succeeds or fails on how well it talks to your sofa and rug, more than anything else in the room.
Common Mistakes People Keep Making
Picking a pattern too busy for a small room tops the list. Large, high-contrast prints can visually shrink a space that’s already tight on square footage.
Skipping wall prep because it’s “just one wall” is another. The physics don’t change based on project size — bumps and dust cause bubbling and peeling regardless of whether it’s one wall or four.
Choosing the wrong wall entirely happens more than expected, usually picking the biggest wall rather than the one people’s eyes actually land on first.
Rushing the drying and curing time causes furniture to dent fresh adhesive before it’s fully set, leaving marks that don’t come out.
Not planning around outlets, switches, or vents leads to sloppy cuts that undercut an otherwise great pattern choice.
There’s also the mistake of ignoring daily practicality. A wall behind the sofa where heads rest constantly needs something wipeable and durable, not a delicate grasscloth that stains from hair oil the first month. And a wall near a heating vent can warp certain adhesives over time if nobody accounted for airflow before hanging anything. None of these are dramatic mistakes individually, but together they separate a wall that looks great five years later from one that needs redoing after eighteen months.
Time is a budget item too, not just money. A single wall takes longer than most people expect once prep, drying, and actual hanging are all factored in. Rushing through a weekend afternoon because guests arrive Sunday almost always shows in the finished result — crooked seams, visible bubbles, edges pressed down before the adhesive fully grabbed. Give the project a full day, and hold off on moving furniture back for at least 24 hours after the last strip goes up.
Tools and Supplies You’ll Actually Need
A lot of first-timers underestimate how much the right tools matter here, focusing entirely on the paper and forgetting the gear that makes the installation go smoothly. A smoothing tool, sometimes called a squeegee or wallpaper brush, is non-negotiable — pressing bubbles out with your hand alone almost always leaves faint ripples that show up under lamp light later.
A sharp utility knife with fresh blades matters more than people expect, too. A dull blade drags and tears the paper at the ceiling line and baseboard instead of cutting cleanly, and that ragged edge is one of the most obvious signs of a rushed job. Swap blades often; they’re cheap, and a clean edge is worth the extra few dollars.
A level and a plumb line, whether it’s a physical string-and-weight setup or a laser level, keep the first strip perfectly vertical. Every strip after that lines up against the first one, so if the starting strip is even slightly off, that error compounds across the entire wall by the time you reach the far corner.
For traditional pasted paper, you’ll also need a pasting brush or roller, a large flat table or clean floor space to apply paste evenly, and a bucket for mixing if the paste doesn’t come pre-mixed. Peel-and-stick skips most of that, which is exactly why it’s the more approachable option for a first attempt, but it still benefits from a smoothing tool and a sharp blade for trimming.
A seam roller is a small tool that gets overlooked constantly, and it makes a bigger difference than its size suggests. Running it gently along the seams between strips, right after hanging each one, presses the edges down firmly enough to prevent the slow curling that shows up months later along every joint. Skipping this step is subtle enough that it won’t be obvious on day one, but it’s usually the first thing that goes wrong on an otherwise well-hung wall.
It’s also worth having a spare bucket of warm water and a clean sponge nearby during installation, regardless of which material you’re working with. Paste and adhesive residue on the surface of the paper, if left to dry, can leave a faint shine or discoloration that’s difficult to remove later. Wiping excess off immediately, before it sets, saves a lot of frustration during the final walk-around once the wall is finished.
Keeping It Looking Good Long-Term
Wallpaper isn’t a one-and-done surface, even though it often gets treated that way. Dust collects on textured papers the same way it does anywhere else, and a soft brush attachment on a vacuum, run gently over the surface every month or so, keeps grasscloth and embossed vinyl from looking dull over time.
Direct sunlight fades color more aggressively on darker, saturated prints than on lighter ones. A wall that gets hit by strong afternoon sun through an uncovered window will fade faster than one in indirect light, so a UV-filtering window film or a sheer curtain can slow that process down considerably, even if it can’t stop it entirely.
Spot cleaning depends entirely on what the wall is made of. Vinyl-coated papers generally tolerate a barely damp cloth and mild soap for small marks without any issue. Grasscloth and other natural fiber papers should never get wet, though — moisture stains or warps them instead of cleaning them, and there’s no undoing that kind of damage. Always check the specific care instructions for whatever material ended up on the wall before reaching for a cloth.
North-facing living rooms, the ones that rarely get that warm afternoon glow, generally do better with warm undertones like terracotta, mustard, or warm greens, since cool grays and blues can make an already dim room feel colder still. South-facing rooms with strong direct light can handle cooler tones and moodier, darker patterns without feeling heavy, because the natural light balances everything out. Pairing that undertone logic with your base wall color is worth planning together — our living room wall colors guide breaks that down further.
Pattern scale matters as much as color choice. A small room with low ceilings usually looks worse with a huge, dramatic repeat, since it can make the walls feel like they’re closing in. Tighter patterns or vertical stripes tend to stretch a room visually instead of shrinking it, while big open rooms with high ceilings can actually swallow a delicate small-scale print until it barely registers from across the space.
What This Typically Costs
For a standard living room wall around 12 feet wide and 9 feet tall, expect 3 to 5 standard rolls depending on the pattern repeat. Budget peel-and-stick runs $25 to $50 per roll, putting total material costs around $100 to $250 for a DIY job. Designer peel-and-stick brands with thicker vinyl and better adhesive run $60 to $120 per roll, pushing costs toward $250 to $500.
Professional installation typically adds $8 to $12 per square foot, or $300 to $600 for that same wall, on top of materials. Compared to a full room repaint plus new furniture to achieve a similar visual shift, a single wallpaper accent wall living room upgrade usually remains the cheaper way to transform how a space feels.
Pattern Trends Shaping Living Rooms Right Now
Trends move faster in wallpaper than in paint, largely because digital printing has made custom and small-batch designs far more affordable than they used to be. A handful of directions keep showing up across recent projects, and they’re worth knowing even if you land somewhere else entirely. For a curated look at where these trends land in practice, browse our classy wallpaper designs for living rooms.
Warm, earthy tones have replaced a lot of the cool gray palettes that dominated for years. Terracotta, olive, and warm ochre show up constantly in botanical and abstract prints alike, and they tend to age better than trend-chasing neutrals because they read as a deliberate choice rather than a default.
Oversized murals depicting landscapes or abstract scenes have grown enormously popular too, partly because producing an entire wall as one continuous image used to be a specialty request and is now something most suppliers can handle without a huge markup. This style works especially well in a wallpaper accent wall living room setup with high ceilings, where a repeating pattern might otherwise feel busy or visually chopped up.
Textural, low-pattern choices like grasscloth, cork, and woven paper have picked up momentum among people who want depth without a loud visual statement — a good fit for rooms that already carry personality through furniture or art and just need something quiet with texture behind it.
There’s also a smaller but growing group choosing deep, saturated colors for a single wall rather than the lighter, brighter shades people used to default to. Done well, with decent natural or lamp light in the room, a dark wallpaper accent wall living room choice reads as cozy rather than cave-like. Done in a dim room with no supplemental lighting, it can genuinely shrink how the space feels. That’s really the underlying lesson in every trend here — the specific pattern matters less than whether it actually suits your room’s light and layout.
None of this should override your own gut reaction to a pattern, either. I’ve watched people talk themselves out of a print they genuinely loved because a design blog said it wasn’t “in” that season, only to regret playing it safe a year later. Trends narrow the field. They shouldn’t make the final decision for you.
One More Real Room Worth Mentioning
A retired couple who’d downsized into a new-construction condo had a living room that felt oddly sterile — nothing wrong with it, just nothing memorable either, the kind of builder-grade white walls you see in every unit on the floor.
We picked a soft sage green grasscloth for the wall behind their reading chairs, and the whole room felt noticeably warmer within a week, even though only one wall had actually changed. That’s the effect a well-chosen wallpaper accent wall living room upgrade tends to have — it’s disproportionate to how much of the room technically got touched.
Frequently Asked Questions
How much does a wallpaper accent wall living room project typically cost?
Most homeowners spend between $200 and $600 total for materials and labor on a single wall. DIY peel-and-stick jobs can come in closer to $100.
Is peel-and-stick wallpaper durable enough for a living room?
Yes, for most households it holds up fine away from direct sunlight or high humidity. Quality brands last several years without peeling.
Which wall should I pick for a wallpaper accent wall living room design?
Choose whichever wall your eyes land on first entering the room — usually behind the sofa, around a fireplace, or facing the entry.
Will a bold pattern make a small living room feel smaller?
It depends on scale. Small or vertical-striped prints can make a room feel taller, while large bold patterns tend to shrink the visual space.
How long does wallpaper typically last in a living room?
Traditional pasted paper can last 15 years or more, while peel-and-stick options generally hold up well for 3 to 5 years.
Final Thoughts
A wallpaper accent wall living room decision really comes down to three things: picking the right wall, prepping it properly, and matching the material to how that wall actually gets used.
Skip any one of those steps and even the most beautiful pattern won’t save the result. Get all three right, though, and it’s one of the few small changes that consistently makes an entire room feel finished rather than half-decorated.