

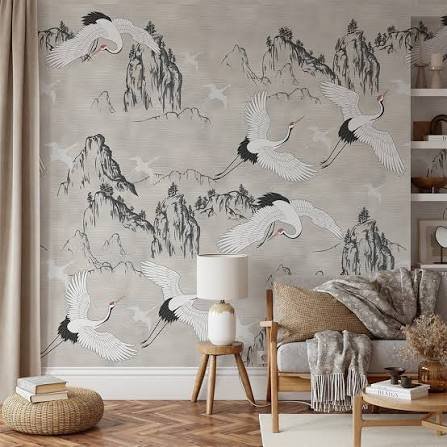
Before I found peel and stick wallpaper, I tried three different ways to update the blank wall behind my bed. First, I bought a gallon of paint in a color that looked warm on the swatch and turned out cold and flat once it dried — two coats wasted and a weekend gone.
Then I hired someone to hang traditional wallpaper, which looked gorgeous but cost more than I wanted to admit and left a faint outline of old paste when I moved out a year later. The third time, I finally tried peel and stick wallpaper, and it took me an afternoon, cost a fraction of the other two options, and came off clean when I redecorated again. That last option is what this guide is about — what it is, where it works best, and how to install it without the rookie mistakes I made along the way.
What Is Peel and Stick Wallpaper?
Peel and stick wallpaper, sometimes called removable or self-adhesive wallpaper, is a wall covering with a built-in adhesive backing that sticks to a wall without paste, primer, or a steamer. You peel away a paper liner and press the material directly onto a clean surface. Most rolls are made from vinyl, fabric-blend, or a newer PVC-free material, and they come in the same range of patterns you’d find in traditional wallpaper — florals, textures, murals, and solid colors.
The technology isn’t brand new. It’s been around in various forms since the early 2000s, but it went mainstream over the last decade as renters and first-time homeowners looked for ways to personalize a space without a long-term commitment. And that’s really the appeal in one sentence: it gives you the visual impact of wallpaper with none of the risk.
Why Peel and Stick Wallpaper Matters for Modern Homes

Housing patterns have shifted. People move more often, rent for longer stretches before buying, and swap decor styles more frequently than past generations did. A wall treatment that locks you into one look for a decade doesn’t fit that lifestyle anymore. Peel and stick wallpaper solves a real problem: it lets you commit to bold design choices without worrying about resale value, landlord approval, or the labor of stripping old paste off drywall.
It also matters because it’s lowered the barrier to entry for interior design. You don’t need a contractor or a weekend free of family obligations. A single motivated person with a level and a squeegee tool can wallpaper a room in an afternoon, which has quietly changed how often people update their homes.
Types and Styles You’ll Find
Not all peel and stick wallpaper is built the same way. Vinyl versions tend to be the most durable and the easiest to wipe clean, which makes them a common choice for kitchens and kids’ rooms. Fabric-blend or “textile” wallpapers have a softer, more matte finish and drape a little more naturally around uneven walls, though they’re slightly more prone to snagging. There are also PVC-free and low-VOC options now, aimed at buyers who want something closer to a natural material.
Beyond material, you’ll see huge variety in scale and finish — grasscloth-look textures, metallic accents, matte botanical prints, and glossy geometric patterns. If you’re shopping for a specific look, this collection of the best peel and stick wallpaper breaks down some of the strongest options by room type and budget.
Getting the Lighting and Room Size Right

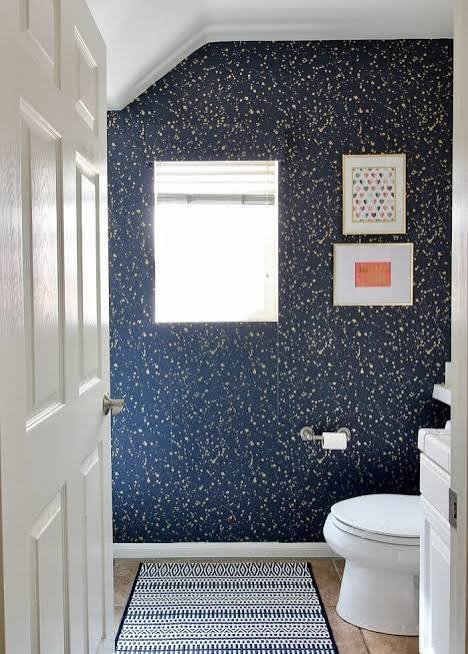
I learned this one the hard way in a friend’s north-facing hallway. She picked a deep charcoal pattern that looked moody and intentional on her phone screen, but once it was up, the low natural light in that hallway made the whole space feel like a closet rather than a design statement. Dark, saturated patterns absorb light and can shrink a room visually, so they work best in spaces that already get strong natural or artificial light, or in rooms where you actually want a cozier, more enclosed feel — a reading nook, a powder room, a bar area.
Smaller rooms generally do better with lighter backgrounds and smaller-scale prints, while larger rooms can handle bold, oversized patterns without feeling cluttered. It’s less about a hard rule and more about testing a sample against your actual wall at different times of day before you commit to a full roll.
Design Styles Worth Considering
If you’re drawn to a soft, romantic look, floral and botanical prints in muted tones pair well with linen textures and wood furniture, giving a room a cottagecore or French country feel. For something more graphic, geometric patterns in black, white, or a single bold accent color suit mid-century or modern minimalist spaces and photograph especially well behind a headboard or console table. This Old House has also pointed to brick-look and wood-plank peel and stick styles as a low-effort way to bring texture into a room without the cost of real materials. And if you want texture without pattern, grasscloth-style and linen-look peel and stick options add warmth and dimension to a room without competing with your existing decor, which makes them a safer choice if you tend to change your mind about color schemes often.
Benefits of Choosing Peel and Stick Wallpaper
The biggest draw is reversibility. You can change your mind in a year, or six months, without the wall bearing any permanent scars from the decision. Cost is another factor — a single roll typically runs far less than professional wallpaper installation once you account for labor. It’s also genuinely faster: a full accent wall that would take a professional installer most of a day can often be done by one person in a couple of hours.
A few other advantages worth knowing:
- No specialized tools required beyond a smoothing tool, a utility knife, and a tape measure
- Works on furniture, cabinets, and stair risers, not just walls
- Available in washable finishes for high-traffic or high-moisture areas
- Easier to match seams than traditional wallpaper because you can reposition it while it’s still wet-set
That’s the only bullet list you’ll see in this guide, because past that point it’s easier to just walk through the actual process.
How to Install Peel and Stick Wallpaper, Step by Step
- Measure and pre-cut your strips. Measure the height of your wall and add a few extra inches of overage top and bottom, then cut your strips before you start hanging anything.
- Mark a plumb line for your first strip. Use a level or a laser line to mark a perfectly vertical guide near the corner where you’ll start, since walls are rarely as straight as they look.
- Peel back a few inches of the backing and align the top. Press it against your plumb line before committing to the rest of the strip.
- Work from top to bottom, peeling the backing away in small sections. Smooth as you go rather than pulling the whole liner off at once.
- Smooth out air bubbles with a squeegee tool, working from the center of the strip outward toward the edges.
- Trim the excess at the top and bottom with a sharp utility knife, then repeat the process for the next strip, overlapping seams slightly where patterns need to line up.
- Match the pattern at each seam before pressing it down fully, since this is much easier to correct in the first thirty seconds than after the strip has fully set.
- Work slowly near outlets, corners, and windows — these are where most mistakes happen, and rushing rarely saves real time in the end.
If you want a deeper walkthrough with troubleshooting for specific wall types, we cover it in more depth in our full guide to stick and peel wallpaper.
A Real Example, Trade-Offs Included
I redid a rental kitchen backsplash with a peel and stick tile-look pattern last spring, and while the final result looked genuinely close to real tile in photos, the seams were visible up close under direct overhead lighting in a way that no amount of smoothing fully fixed. It’s a small imperfection, but if you’re chasing a flawless, high-end finish for a listing photo shoot, that’s worth knowing going in. For everyday living, though, nobody who’s visited the kitchen has noticed or cared.
Expert Tips From Trial and Error
I’ve come to trust the “one extra pass” rule: whatever amount of smoothing feels like enough, do one more pass with the squeegee before moving to the next section. It sounds excessive, but bubbles that seem invisible in the moment tend to show up two days later once the adhesive fully sets.
Common Mistakes to Avoid
The most frequent mistake is rushing the wall prep, since peel and stick adhesive bonds to whatever is actually on the wall, dust and all, not to some idealized clean surface. Another common issue is pulling the backing off in one long motion instead of small sections, which makes it far harder to correct alignment before the adhesive grabs. People also tend to underestimate how much extra material they need for pattern matching, ordering exactly enough for the square footage and then coming up short once they account for wasted trim pieces at seams and corners. Buying roughly ten to fifteen percent more than your measured square footage avoids that scramble mid-project.
Styling Notes by Room Size
In smaller rooms like powder rooms or closets, peel and stick wallpaper is one of the few design choices that pays off disproportionately to its cost, since a bold pattern in a contained space reads as intentional rather than overwhelming. In larger open-plan rooms, it works best applied to a single accent wall or a defined architectural feature rather than all four walls, which keeps the pattern from visually competing with itself across a big span. If you’re leaning toward something dramatic for a smaller space, black peel and stick wallpaper is worth a look — it tends to read as intentional rather than heavy when it’s contained to one wall.
Maintenance and Care
Most vinyl peel and stick wallpaper can be wiped down with a damp cloth and a mild soap solution, which is part of why it’s become popular in kitchens and bathrooms. Avoid abrasive scrubbing pads, which can lift the surface print, and steer clear of harsh solvents that can degrade the adhesive underneath. If a corner starts to lift, a small dab of wallpaper seam adhesive or even a bit of craft glue pressed under the edge usually solves it without needing to replace the whole strip.
Frequently Asked Questions
Is peel and stick wallpaper actually removable without damaging paint?
In most cases, yes, as long as the wall paint has fully cured and you remove it slowly, pulling at a low angle rather than straight out. Freshly painted walls under about a month old are more likely to show damage.
Can I use peel and stick wallpaper over textured walls?
It’s possible on lightly textured surfaces, but heavily textured or popcorn walls will show through the pattern and prevent a clean bond. A smooth, primed surface gives the best results.
Does peel and stick wallpaper work in bathrooms?
Yes, particularly vinyl versions, as long as it’s kept away from direct water contact like inside a shower stall. Good ventilation helps the adhesive hold up over time in a humid room.
How long does peel and stick wallpaper typically last?
Most quality peel and stick wallpaper holds up for several years on the wall, though this varies by brand, humidity levels, and how much direct sunlight the wall receives.
Conclusion
Peel and stick wallpaper has earned its popularity honestly. It solves a genuine problem for renters, frequent movers, and anyone who wants to test a bold design idea without a permanent commitment. Between the lower cost, the shorter install time, and the fact that it comes off clean when you’re ready for a change, it’s hard to find a real downside for most rooms in a home. That said, it isn’t flawless — seams can show under certain lighting, and heavily textured walls will fight against a clean finish no matter how careful you are.
If you’re weighing your options, it’s worth browsing a few finishes side by side — including bolder choices like black peel and stick wallpaper for a moodier accent wall — before settling on the pattern that fits your space. Start with one wall, get comfortable with the process, and you’ll likely find yourself reaching for it again the next time a room needs a refresh.