

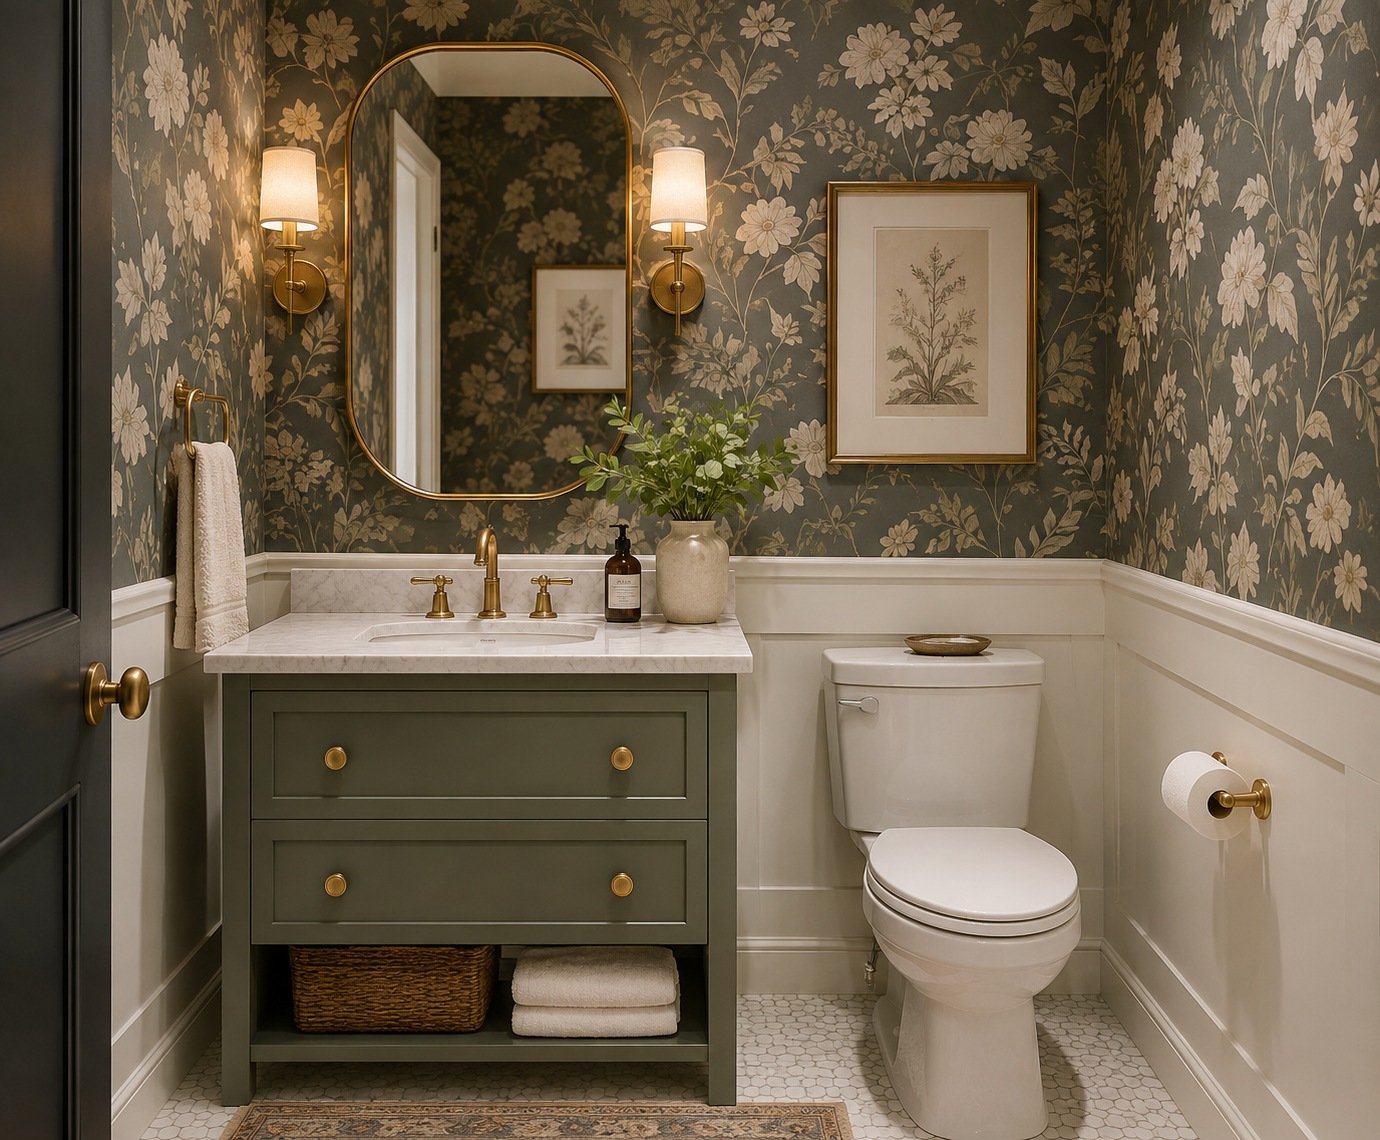
Swapping plain drywall for a classy bathroom wallpaper completely shifts how a pokey little washroom feels without forcing you to bleed cash on custom marble or subway tiles. Look, I get why people panic the second you mention hanging wall coverings anywhere near plumbing fixtures. Most folks picture soggy sheets curling off the plaster like old masking tape within two weeks. I used to hold that exact same prejudice until I started slapping heavy vinyl up on my own renovation projects.
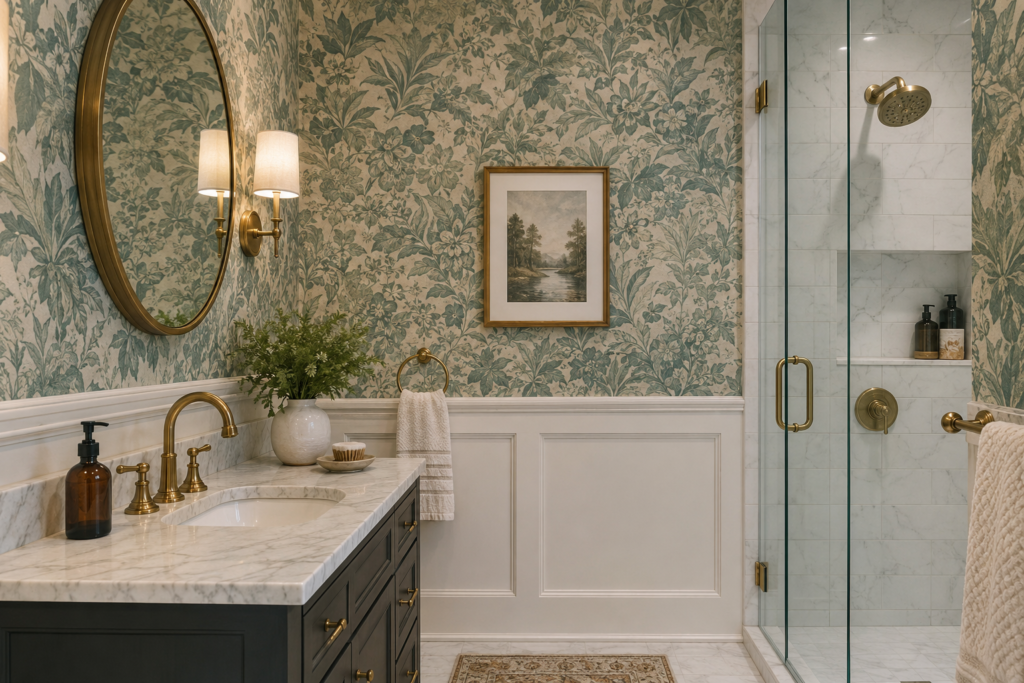
The actual trick to finding a classy bathroom wallpaper that stays stuck comes down to skipping cheap bargain-bin paper rolls and buying thick substrates built specifically for damp air. Wrapping your walls in high-end wallpaper for bathroom surfaces converts a dull water closet into something that looks like a boutique hotel powder room. Going with a classy bathroom wallpaper gives you instant visual texture that flat eggshell paint just can’t mimic no matter how many coats you roll on.
Why Small Room Wraps Just Work
Half-baths and guest washrooms are usually tight, boxy footprints that lack any real architectural soul. Sure, slapping on a fresh coat of satin paint brightens things up a bit, but the space still ends up feeling flat and completely predictable. Throwing a rich classy bathroom wallpaper pattern across those vertical planes flips the whole story—it turns a routine pitstop into an intentional design choice.
Steam freaks people out, which is fair enough if you’ve ever dealt with bad drywall mold. Hang thin paper inside a windowless room with a roaring hot shower, and yeah, you’re going to watch the seams split eventually. But picking a classy bathroom wallpaper engineered specifically for high-moisture zones means the material handles daily condensation cycles without throwing a fit.
[ Wall Preparation ]
│
▼
[ Primer / Sizing Layer ]
│
▼
┌───────────┴───────────┐
▼ ▼
[ Paste-The-Wall ] [ Self-Adhesive ]
(Heavy Vinyl) (Peel & Stick)
│ │
▼ ▼
[ Roll & Match ] [ Squeegee Seams ]
Material Choices: What Actually Holds Up
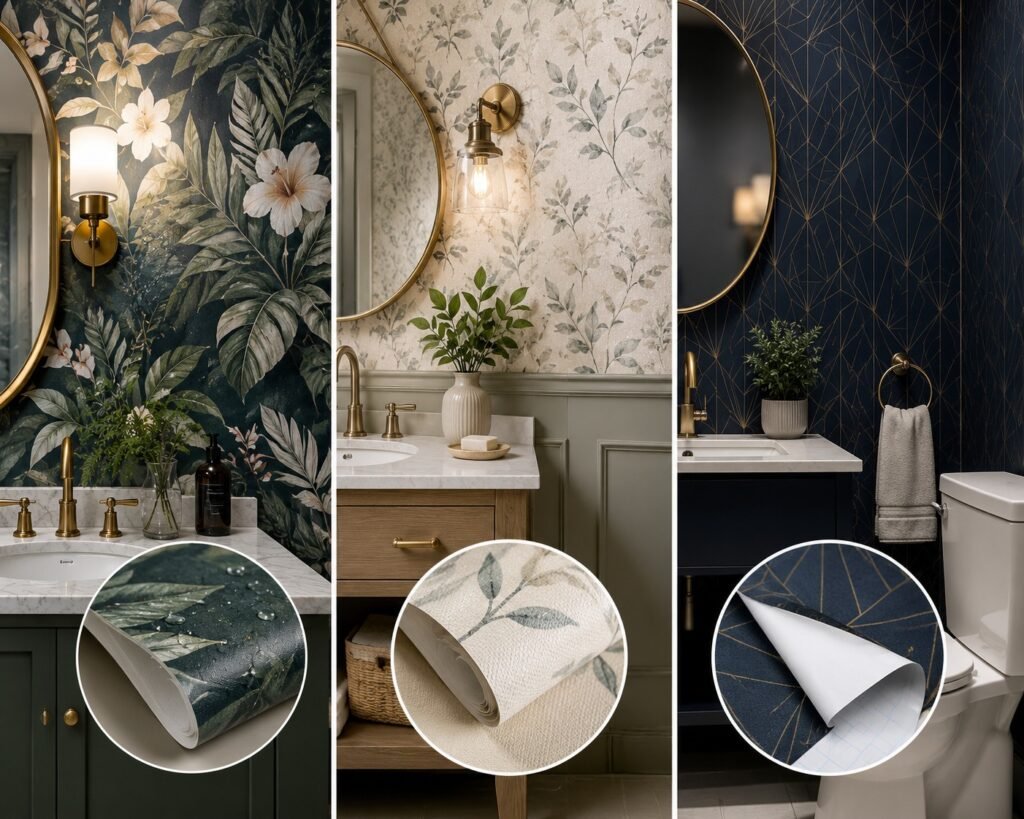
Not every roll sitting on retail store displays copes with steam gracefully. You can’t just grab a random floral motif off a clearance rack and expect splash water to behave itself.
Solid Sheet Vinyl
This is pretty much the gold standard for damp locations. The printed design sits right on a dense PVC layer that sheds water droplets like rubber boots and cleans up with a quick wipe.
Non-Woven Synthetics
A mixture of natural wood fibers and synthetic threads that refuses to stretch or shrink when temperature spikes. You brush adhesive straight onto the plaster, slap the strip down, and lock it in place.
Pressure-Sensitive Peel and Stick
Self-adhesive tech has gotten way better over the last few years. If you want high design without messing around with wet glues, grab a robust peel and stick bathroom wallpaper setup for a stress-free weekend project.
Pattern Selection: Avoiding The Tiny Room Trap
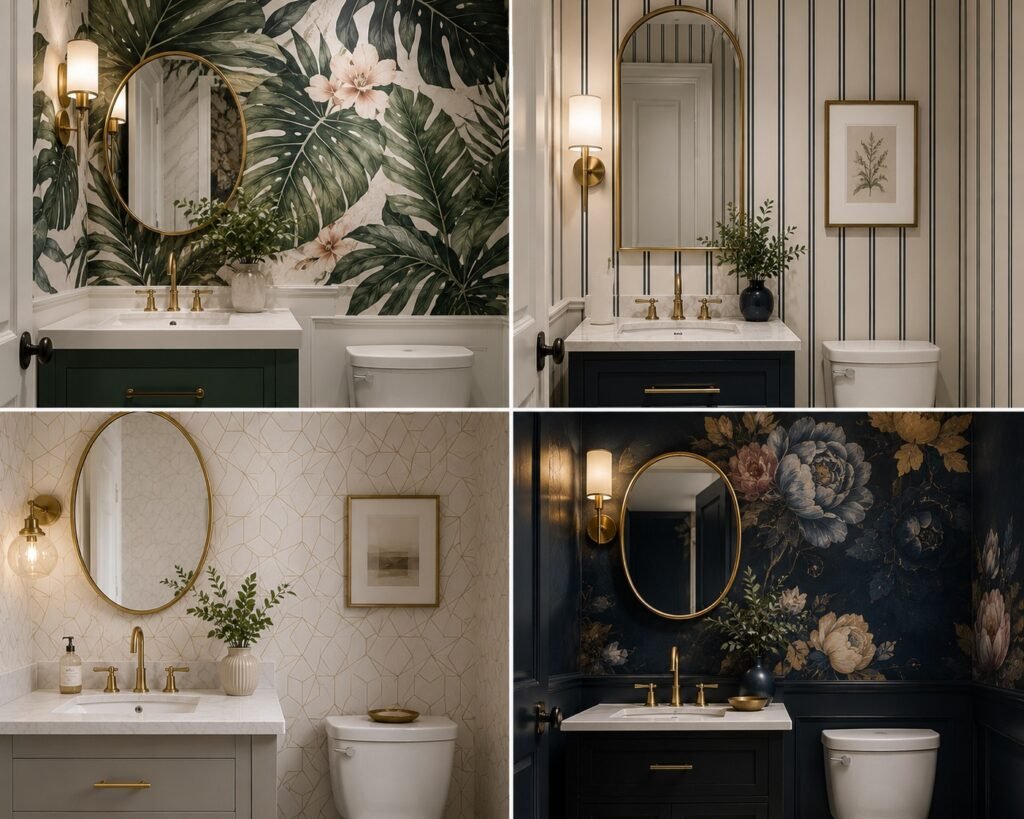
Scale dictates how big a room feels way more than your base color choices ever will. The single biggest mistake DIYers make is assuming a tiny powder room automatically needs microscopic prints.
- Over-sized Botanical Scenes: Massive leaf graphics stretch visual boundaries right past the actual wall corners.
- Crisp Vertical Lines: Forces your eyes to look upward, making standard eight-foot ceilings feel way taller than they really are.
- Subtle Geometrics: Keeps things sharp and structured without hurting your eyes while you’re brushing your teeth early in the morning.
- Deep Moody Murals: Dark navy or charcoal background prints mixed with warm brass fixtures create instant high-end drama.
Design experts over at Architectural Digest point out that using larger patterns inside tight washrooms actually disguises close corner boundaries, tricking your brain into seeing a much wider room.
Preparation and Installation Steps for Long-Term Durability
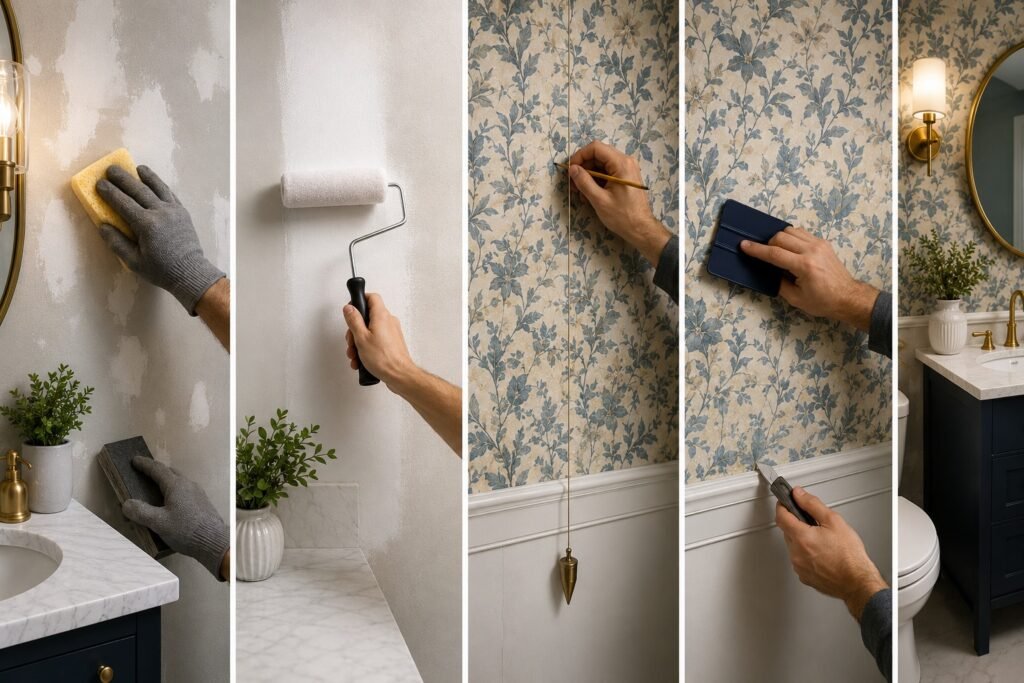
Rushing through surface preparation is the number one reason wallpaper seams start lifting six months down the line. You simply cannot skimp on wall foundation work if you want your classy bathroom wallpaper to last.
| Step | Action Required | Essential Tools | Purpose |
| 1. Scrub & Sand | Wash walls with TSP, fill wall divots, sand smooth. | TSP fluid, block sander, spackle | Glue fails fast on drywall dust or greasy thumb prints. |
| 2. Seal Drywall | Roll an acrylic-based wallpaper primer across every inch. | Shielding primer, paint roller | Stops porous drywall from drinking all the moisture out of your paste. |
| 3. Snap Plumb Line | Strike a dead-straight vertical reference line. | Spirit level, soft lead pencil | Corner walls are almost never square; this keeps your pattern level. |
| 4. Smooth Out Air | Work top-to-bottom, driving trapped air to the edges. | Plastic squeegee, fresh utility razor | Prevents bubble pockets and guarantees tight seam contact. |
If you happen to rent your place or just like changing up your decor every couple of years, grabbing a durable peel and stick wallpaper for bathroom spaces lets you yank strips off later on without shredding the paint underneath.
Material Performance Comparison Matrix
Here is how different roll materials deal with splash zones, scrub brushes, and long-term steam cycles over time:
| Category | Type 1 Solid Vinyl | Non-Woven Blend | Peel-and-Stick Sheet | Standard Paper |
| Moisture Armor | High | Moderate | High | Extremely Low |
| Scrubability | Heavy Duty | Gentle Wipe | Damp Cloth | None |
| Application Style | Heavy Paste | Paste-the-Wall | Pressure Sensitive | Water Soak |
| Expected Lifespan | 10–15 Years | 7–10 Years | 2–5 Years | 1–3 Years |
For master bathrooms that take a beating from daily shower steam, picking a thick vinyl wallpaper for bathroom walls ensures your seams stay locked down tight without curling at the edges.
Hardware and Lighting Interplay
Your chosen pattern doesn’t exist in a vacuum. It interacts directly with vanity light bulbs, mirror frames, and plumbing hardware.
- Light Bulb Temperatures: Cool silver patterns look chalky and dead under harsh 5000K daylight LEDs. Stick around warm 2700K to 3000K bulbs to keep room tones rich and cozy.
- Metal Finishes: Aged brass fixtures look stunning against deep green floral patterns, while matte black hardware pops sharply against white marble looks.
- Mirror Selection: Hang frameless or narrow-edged mirrors over busy patterns so your decorative frames aren’t fighting the wall art for attention.
As highlighted in home maintenance guides on The Spruce, placing stone or tile backsplashes right behind sink faucets shields paper edges from continuous water splashes.
Common Installation Pitfalls to Dodge
Applying wall coverings isn’t rocket science, but rushing through key phases causes really obvious mistakes.
- Stretching Panels: Pulling vinyl sheets sideways while matching patterns deforms the print. Once dry, it snaps back and leaves visible gaps between strips.
- Ditching The Backsplash: Running paper straight down to meet the sink deck without a barrier causes standing water to soak up into the bottom edge.
- Ignoring Ventilation: No glue stays sticky forever if hot steam sits trapped against ceiling corners for an hour every afternoon.
Long-Term Maintenance Reality Check
Taking care of moisture-rated coverings takes almost no effort once you’ve handled surface prep correctly. Just wipe high-touch areas around light switches using a soft microfiber cloth once a month or so. Stay away from harsh chemical sprays or abrasive scouring pads that tear up protective clear coats. If a seam edge ever lifts slightly because of a sudden heat spike, slide a tiny drop of clear seam sealer behind the loose lip, roll it flat with a seam roller, and wipe away any squeeze-out right away.
Frequently Asked Questions
Is hanging wallpaper in a full bath with a shower actually safe?
Totally, as long as you stick to solid sheet vinyl or coated non-woven rolls while keeping a decent ceiling exhaust fan running to pull out dense steam after hot showers.
Does self-adhesive wallpaper rip off drywall paint when removed?
Not if you prepped first; rolling an acrylic wallpaper primer over the wall creates a hard barrier that stops sticky backings from tearing up underlying drywall paper later on.
Which pattern dimension works best inside a tight half-bath?
Surprisingly, massive bold graphics beat micro prints every time in tiny rooms because giant visuals blur sharp corners and trick your eyes into perceiving extra elbow room.
How do you stop water droplets from ruining wallpaper right behind the faucet?
Your best move is running a four-inch stone or tile backsplash directly above the sink counter, giving your wall pattern a raised, dry baseline to start from.
Why do wallpaper joins pop open weeks after finishing the job?
Seams split open because someone yanked the sheets too hard while matching patterns, or because unprimed drywall sucked out all the glue moisture before the bond cured.
Can I paste fresh wallpaper straight over existing ceramic wall tiles?
Bad idea—grout grooves will bleed right through the paper face. You need to skim-coat grout lines flat with joint compound, sand it flush, and prime before hanging sheets.
How many years will vinyl wall coverings last in humid rooms?
When slapped onto properly primed plaster, good commercial-grade vinyl easily handles daily humidity cycles for over a decade without peeling at the corners or losing color depth.
Conclusion
Wrapping up a washroom update doesn’t mean you have to rip out existing plumbing lines or blow ten grand on custom tile work just to get a stylish space. Deciding to install a classy bathroom wallpaper brings immediate depth, rich visual warmth, and tailored character that standard eggshell paint simply cannot deliver no matter how many coats you roll on. I’ve watched plain, gloomy half-baths transform into the most talked-about rooms in a home within a single afternoon just by hanging four rolls of good paper.
The real trick comes down to respect for the process. Take the extra hour to wash your drywall with TSP, sand down those subtle mud bumps, and roll on a coat of quality acrylic primer. Don’t skip these steps thinking the paper will hide structural imperfections—moisture has a funny way of highlighting every single mistake you try to cover up. Choosing moisture-conscious materials like solid sheet vinyl or high-grade non-wovens gives your adhesive the best chance to form a permanent bond.
Double-check that your ventilation fan actually pulls air properly so condensation doesn’t pool on the ceiling after long showers. Once those fundamental prep steps are locked down, pick a bold pattern that speaks to your personality, order a couple of test swatches to check under your vanity lighting, and take the plunge. You will wonder why you spent years staring at boring white walls when you could have built a luxury sanctuary in a single weekend.