

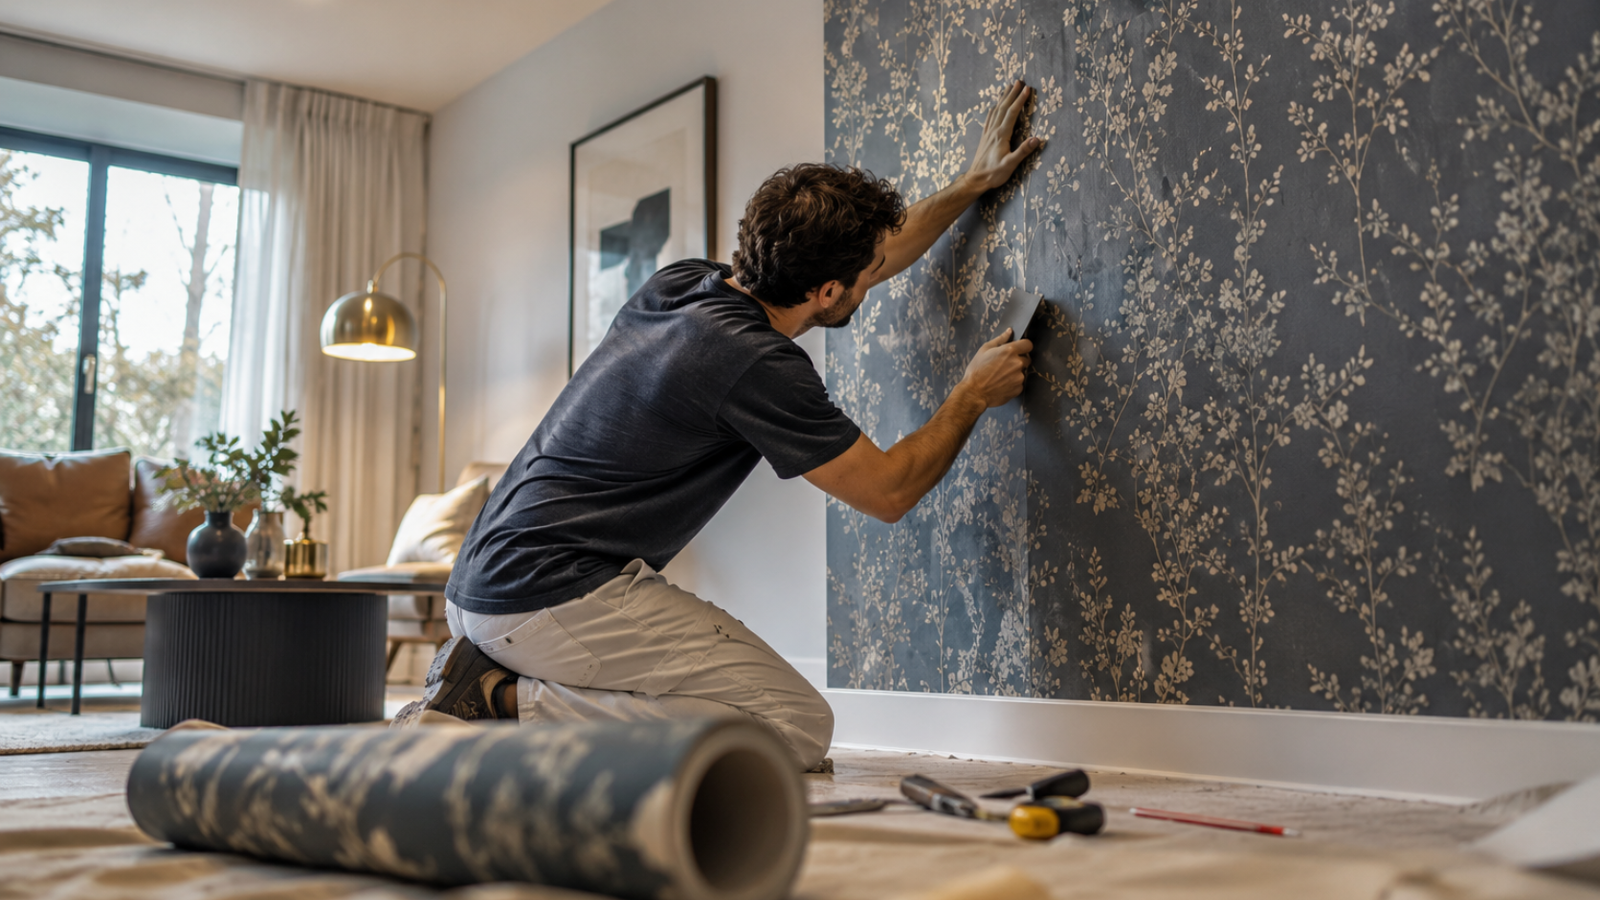
Most people assume stick and peel wallpaper looks cheap up close. It doesn’t — here’s the real, honest breakdown of what works, what fails, and why.
There’s a persistent idea floating around home decor forums that stick and peel wallpaper is basically a glorified sticker — something that looks fine in a listing photo and terrible in person. I believed that too, until a friend talked me into helping her wallpaper a nursery three years ago. It wasn’t flimsy. It wasn’t cheap-looking. And it definitely wasn’t the fifteen-minute job the packaging implied. What it was, honestly, is a legitimate wall-covering option that gets unfairly lumped in with dorm-room contact paper.
That misconception costs people good results. Someone assumes it’s basically foolproof, skips the prep work, slaps it up crooked, and then blames the product when a corner lifts within a month. Meanwhile someone else avoids it entirely because they think it’ll look plasticky, and they miss out on a genuinely useful renovation tool. Neither reaction is fair to what stick and peel wallpaper actually is once you understand how it behaves.
So let’s get into it properly — what it’s made of, who it actually suits, where it holds up, where it doesn’t, and the details that separate a professional-looking wall from a peeling mess six weeks later.
What Stick And Peel Wallpaper Actually Is
Strip away the marketing language and stick and peel wallpaper is simply a printed wall covering with a pressure-sensitive adhesive layer built into the back. Peel the paper liner off, press the material against a wall, and it bonds on its own — no wheat paste, no primer bucket, no steamer for removal later. That’s really the whole mechanism.
What separates good versions from bad ones comes down to two things: the base material and the print quality. Cheap rolls often use thin vinyl with flat, low-resolution printing that looks noticeably “digital” up close. Better rolls use woven textile or thicker vinyl with a matte or lightly textured finish that reads far more like traditional wallpaper from a normal viewing distance. If you’ve only ever seen the bargain-bin version, it’s easy to assume the whole category looks the same. It doesn’t.
Rolls generally run 20 to 24 inches wide and 9 to 18 feet long, though exact dimensions vary between brands. Pricing spans roughly $15 to $60 per roll, with hand-illustrated or licensed artist prints landing at the higher end and simple textures or solid colors sitting toward the bottom. Coverage catches people off guard almost every time — a single roll rarely covers an entire wall on its own, and most standard bedroom walls need two to four rolls once pattern matching and cutting waste around outlets get factored in.
It’s also worth knowing this category didn’t start out aimed at homes at all. Early pressure-sensitive wall coverings were built for trade show booths and temporary retail displays in the early 2000s, where a short lifespan and easy takedown mattered more than long-term durability. It took roughly a decade for the adhesive formulas to get refined enough for residential paint without risking damage on removal, which explains why some people’s negative first impression came from an early-generation product that genuinely did leave sticky residue behind. Most reputable brands solved that specific problem years ago with lower-tack, repositionable adhesives built specifically for painted drywall.
For anyone weighing this against a bigger room redesign, our wallpaper accent wall inspiration roundup shows several finished spaces where the material reads as intentional, not improvised.
Who Stick And Peel Wallpaper Actually Suits
Renters get mentioned constantly in articles about this material, and for good reason — most leases prohibit permanent alterations, and something removable that doesn’t damage cured paint solves a real problem. But renters aren’t the only audience, and treating them as the sole use case undersells the product.
Homeowners who redecorate often benefit just as much, maybe more. If you like switching up a room’s look every couple of years, buying and applying fresh paint every single time gets expensive and time-consuming fast. Swapping wallpaper takes an afternoon per wall.
Parents decorating a nursery or kid’s room fall into a specific niche too — themes get outgrown quickly, and nobody wants to repaint a mural every eighteen months. Small business owners setting up a feature wall in a café or retail fitting room lean on it for the same reason: low commitment, fast turnaround, easy to refresh for a seasonal look.
And then there’s the group nobody talks about much: people testing a bold design decision before committing to it permanently. A deep green or a busy floral print is a big leap in traditional paint or paste-and-paper wallpaper. Testing it as stick and peel wallpaper first, on one wall, lets someone live with a strong choice before deciding whether to make it permanent elsewhere in the house.
Interior designers staging homes for sale have quietly leaned on this material too, even if it doesn’t get credited much in shelter magazine features. A striking accent wall in a primary bedroom photographs far better for listing photos than a plain painted one, and it costs a fraction of what a full paint refresh runs. Unlike paint, it comes down cleanly in an afternoon if the next round of buyers doesn’t respond to it, which matters when a house sits on the market longer than expected.
Small business owners fall into this category more often than people assume, too. A coffee shop feature wall or a boutique fitting room backdrop needs to look intentional without pulling a space out of commission for days while paint dries and fumes clear. A weekend install with zero downtime solves that problem in a way a commercial paint job simply can’t match.
Really, the common thread across every one of these groups is the same: stick and peel wallpaper works best for people who want a strong visual change without locking themselves into it forever. That’s not a compromise so much as a genuinely different way of thinking about a wall — less like a permanent architectural decision, more like a piece of furniture you can swap out when your taste shifts.
The Materials Behind It
Vinyl is the most common base and the one most people picture when they hear the term. It’s thick enough to hide minor wall imperfections, wipeable, and generally the cheapest option per roll. The tradeoff is breathability — vinyl traps moisture against the wall, which becomes a real issue in poorly ventilated bathrooms.
Woven or fabric-backed rolls sit at the premium end. They have a soft, matte texture that photographs beautifully and feels closer to a real wallcovering than a decal. They breathe better, making them a smarter choice for anywhere humidity fluctuates, but they’re thinner and less forgiving of a bumpy wall — every flaw underneath shows through.
Polyester blends land in the middle on price, durability, and breathability, which makes them a reasonable default when you’re not sure which direction to go.
Thickness matters more than most buying guides mention. Rolls rated above roughly 0.2mm do a noticeably better job hiding old nail holes, faint texture, or minor drywall seams than anything thinner. If your walls aren’t perfectly smooth, that number is worth checking before you commit to a print you love.
Finish is another detail people gloss over. Matte finishes hide fingerprints and light smudging well, which makes them the safer pick for hallways or anywhere kids touch the wall constantly. Glossy or semi-gloss finishes bounce more light around a room and can make a small space feel bigger, but they’re far less forgiving of a sloppy install — every seam and trapped bubble shows up under a shiny surface in a way it never would on matte.
Print scale interacts with material choice more than most people expect too. A large, dramatic floral or geometric pattern on a thin fabric roll can photograph beautifully but feel overwhelming in a genuinely small bedroom, while the same exact print on a heavier vinyl roll tends to read as more grounded once it’s actually installed. It’s a subtle distinction on a screen, but it’s the kind of thing that separates a wall people compliment from a wall that feels like too much the moment you’re standing in the room.
Why Adhesion Works The Way It Does
The bond comes from a pressure-sensitive acrylic adhesive, the same broad category used on high-end vinyl decals. It’s not designed to be instantly permanent — it strengthens gradually the longer it stays pressed against a compatible surface, which is why the first two days after installation matter more than people assume.
Wall condition drives almost everything here. A wall that’s dusty, greasy, or coated in flat matte paint gives the adhesive far less to grip than a wall finished in satin or semi-gloss. Paint cure time gets overlooked constantly, too — paint can feel dry to the touch within hours but keeps releasing compounds and continuing to harden for weeks afterward. Manufacturer guidance from York Wallcoverings’ installation resources recommends letting freshly painted surfaces cure for a minimum of four weeks before applying peel-and-stick material, and that lines up with what I’ve seen go wrong when people rush the timeline — early failures almost always trace back to paint that hadn’t finished curing.
Room temperature affects the working window too. Adhesive underperforms in cold rooms below roughly 65°F and gets aggressively tacky in rooms that run too warm, making repositioning harder. A room sitting between 65 and 75 degrees gives you the most forgiving application experience.
Wall material changes the equation too, and it’s rarely explained clearly on product packaging. Painted, cured drywall is the gold standard. Plaster walls in older homes can work fine as long as they’re sealed and smooth, but bare or unsealed plaster tends to be too porous for even adhesion. Wood paneling almost always needs a primer coat first — raw or lightly finished wood absorbs adhesive unevenly, and that patchy bond eventually shows up as faint rippling a few weeks after installation. Tile and glass, surprisingly, tend to work quite well for smaller applications like a backsplash accent, since the smooth non-porous surface gives the adhesive an ideal amount of grip to hold onto.
Ambient humidity during the actual application matters separately from long-term humidity exposure after the wallpaper’s up. Hanging strips right after a hot shower or mopping a nearby floor introduces moisture into the air that weakens the initial tack, even in a room that’s not typically humid. Running a fan or cracking a window for twenty minutes before starting solves this in most cases.
What You Actually Gain
Speed is the most obvious win. A single accent wall around ten feet wide typically takes two to three hours for one person working at a normal pace, with zero drying time required before the room’s usable again.
Cost control matters more than people expect going in. Hiring a professional for traditional wallpaper installation can easily run several hundred dollars in labor alone for a mid-sized room. Since stick and peel wallpaper is realistically a solo or two-person job, that entire line item disappears from the budget.
It’s forgiving in a way few other wall treatments are. A crooked paint line means repainting the section. A crooked strip of wallpaper, caught within the first few minutes, usually just means peeling it back and repositioning — the adhesive allows for some correction before it locks in fully.
There’s also a reversibility factor that goes beyond just renting. Trends change. Kids grow up and outgrow a theme. A home office becomes a nursery becomes a guest room over the years. Being able to update a wall’s entire personality in an afternoon, repeatedly, without hiring anyone, is a genuinely different kind of home flexibility than most permanent finishes offer.
Storage and reuse deserve a mention too, since paint doesn’t offer the same option. Leftover rolls sit in a closet for years without degrading, ready for a future repair or a completely different project down the line. Some manufacturers even reprint their most popular patterns years later, though dye lots can shift slightly between print runs, so buying one spare roll upfront is smart if a future repair needs to match exactly.
There’s a low skill-ceiling advantage worth naming directly, too. I’ve watched someone with zero home improvement background go from a rough, bubbly first strip to a genuinely clean-looking wall by the third or fourth strip in the same afternoon. That learning curve is steep for maybe fifteen minutes and then flattens out fast — try saying the same thing about traditional pasted wallpaper, where a beginner’s early mistakes are far harder to correct once the paste has already set into the wall.
What It Won’t Do For You
Textured walls are the biggest dealbreaker. Orange-peel texture, popcorn ceilings extended down a wall, heavy stucco — none of it plays nicely with this material. The adhesive needs a smooth surface to grip evenly, and skipping that requirement guarantees bubbling no matter how carefully you apply it.
Humidity is the second major limitation, particularly with vinyl. Bathrooms without solid ventilation can see edges lift within weeks as trapped moisture works against the bond from underneath. If a bathroom project is non-negotiable, look specifically for a roll marketed as moisture-resistant rather than assuming standard vinyl will hold up.
Longevity is genuinely inconsistent across the category, and that inconsistency doesn’t get discussed enough. Some rolls perform beautifully for three-plus years. Cheaper vinyl in high-traffic hallways or rooms with big temperature swings can start showing seam separation in twelve to eighteen months. Reading reviews for the specific product, not just the general category, saves a lot of disappointment.
Direct sun is another quiet problem. Walls that get several hours of strong afternoon light daily can see printed colors visibly fade within a year on cheaper ink processes. It’s worth checking whether a roll is rated fade-resistant if that’s the wall you’re covering.
Cost can also sneak up on people who assume this is automatically the budget option compared to everything else. A large accent wall using a premium designer print, once extra rolls for pattern matching and unavoidable waste get added in, can end up costing close to a professional paint job for that same wall. It’s still typically cheaper than a fully installed traditional wallpaper job, but it isn’t always the bargain the marketing implies, especially once you’re buying multiple rolls of a higher-end print.
None of this means stick and peel wallpaper is a poor choice — it just means the marketing tends to flatten out the nuance. Every wall treatment has conditions it performs best under, and pretending this one is universally perfect for every room in every climate sets people up to blame the product for what was really a mismatch between the material and the space it went into.
Getting It On The Wall: A Realistic Walkthrough
- Clean thoroughly and let it dry overnight. Soap and water, a dry cloth, and patience. Skipping this is the number one reason installs fail early.
- Confirm the paint finish and cure time. Satin or semi-gloss gives the best grip. If the wall was painted recently, wait the full recommended curing period before starting.
- Order about 10% more than your measurements suggest. Pattern matching eats material fast, and running short mid-project with a mismatched dye lot is a real headache.
- Draw a level vertical guideline before touching any wallpaper. Walls are rarely perfectly straight, and lining up against a crooked ceiling or floor throws off the whole pattern.
- Peel a few inches, place, then continue. Never remove the full backing at once. The material folds onto itself almost instantly if you try.
- Smooth from the center outward with a felt-edged tool, not your hands. Push air toward the edges in diagonal strokes rather than trapping bubbles in the middle of the strip.
- Trim at the ceiling and baseboard with a sharp blade. Dull blades tear instead of cutting clean, so swap it out more often than feels necessary.
- Overlap seams a quarter inch, then cut through both layers at once. Peel away the two thin excess strips for a nearly invisible join.
- Leave it alone for 24 to 48 hours. Hold off on hanging anything that puts pressure on the surface until the adhesive finishes settling.
Corners and outlets slow most people down unnecessarily. For inside corners, wrap an inch or two around rather than trying to cut an exact seam right at the edge. For outlets, cut power at the breaker, remove the cover plate, apply the wallpaper over the opening, then cut an X across it and trim the flaps back before reattaching the plate — far cleaner than working around an attached cover.
Tool quality matters more than most first-timers realize. A felt-wrapped metal smoothing tool outperforms the plastic squeegees that ship free with cheaper rolls, since the felt side won’t scratch a matte print while still pushing bubbles out effectively. A sharp blade matters just as much — a dull utility knife drags and tears instead of slicing clean, so it’s worth swapping the blade every few strips rather than trying to stretch one across an entire room’s worth of trimming.
Lighting during the actual application changes how well you can spot problems, too. Working in direct midday sun hitting the wall makes bubbles and slight misalignment surprisingly hard to see in the moment. Early morning or late afternoon light, angled rather than direct, shows every imperfection far more honestly — more than once I’ve finished a strip in harsh glare only to notice a coin-sized bubble once the sun had shifted an hour later.
Where It’s Been Used Well
A coworker wallpapered her rental’s living room accent wall with a botanical print, and it changed how the entire apartment photographed when she eventually listed it for sublet — multiple people mentioned the wall specifically in their inquiries. If you want a broader look at how that kind of single-wall statement plays out across different room layouts, our bedroom wallpaper decor guide covers several material choices worth considering before you commit to one.
I did a small kitchen backsplash strip using a moisture-rated roll, and two years of regular cooking splatter later, it still looks sharp — proof that matching the material to the room matters more than installation skill alone.
A neighbor tackled her stairwell, which took most of a weekend rather than an afternoon because of the angled cuts following each step. The narrow hallway went from dark and forgettable to genuinely bright once it was finished, which is a good reminder that not every space behaves like a flat, simple wall — angles and alcoves need extra time budgeted in.
One cautionary example worth sharing: a friend applied thick vinyl wallpaper directly over a textured “orange peel” wall, assuming the thicker material would compensate for the surface. It didn’t. Bubbles appeared within two weeks, and the whole section had to come down and get reapplied after she skim-coated the wall smooth first.
A colleague of mine papered the inside back panel of an open bookshelf instead of a full wall, which turned out to be one of the smartest small-scale uses I’ve seen. It gave the shelving unit a designed, deliberate look without the commitment or cost of covering an entire room, and it took under an hour since the panel was barely three feet wide. If you’re nervous about your first attempt, starting with something that size — a closet door, a shelf back, a small powder room — takes a lot of the pressure off before you tackle a full accent wall.
I also want to mention a case where the material genuinely wasn’t the right call, because it’s easy to get swept up in success stories. A relative tried using a basic vinyl roll on a sunroom wall that gets nearly six hours of direct afternoon light daily. Within eight months, the print had visibly faded compared to a spare strip stored in a drawer, and the color difference was obvious side by side. She ended up switching to paint for that particular wall and saving the wallpaper for a room with less direct exposure — a reasonable trade-off once she understood why the fading happened.
Advice From Experience
Buy a real smoothing tool. It’s usually under ten dollars and does more for the final result than any technique tip could. Fingers and old gift cards just don’t distribute pressure evenly across a wide strip.
Bring in a second person for anything taller than about six feet. Holding a long strip steady while peeling and aligning it solo is where most tearing and crooked corners happen.
Keep a hairdryer nearby on low heat. It softens the adhesive just enough to reposition a crooked strip or release a stubborn bubble without damaging the printed surface. For more detail on surface prep specifically, including how to handle old wallpaper underneath before starting fresh, This Old House’s buying guide walks through what to check before your first strip goes up.
Don’t stretch the material while applying it, even when a wrinkle is tempting to pull taut. Stretched sections tend to shrink back slightly over time, which distorts pattern alignment right at the seams.
Test a small swatch in an inconspicuous spot before committing to a full wall, especially if you’re working with an unfamiliar paint finish or an older wall you’re not fully sure about. A twenty-four hour test tells you far more than guessing, and it costs nothing but a bit of patience.
Order your rolls in a single batch rather than buying a few now and more later. Manufacturers print in dye lots, and even a slight color shift between two batches of the “same” print becomes obvious once it’s up on the wall side by side.
Where People Go Wrong
Rushing wall prep tops the list every time. Dust, cooking grease, or leftover cleaning residue all weaken the bond before the wallpaper’s even gone up.
Ignoring the printed pattern repeat measurement causes obvious, avoidable mismatches at every seam. It’s printed right on most packaging and takes thirty seconds to check.
Peeling the entire backing off before positioning the strip is probably the single most common beginner mistake. The material sticks to itself, folds, and often tears when you try to separate it again. Peel a little, place a little, every single time.
Installing directly over wallpaper that’s already peeling or bubbling doesn’t fix the underlying issue — it just hides it temporarily while trapping the original problem underneath. Deal with existing wall damage first.
Working too fast in the first fifteen minutes causes more long-term frustration than working too slow. A rushed, crooked first strip throws off alignment for every strip that follows it around the room.
Underestimating measurements is a quieter mistake that still ruins plenty of projects. It’s tempting to eyeball a tall wall and grab what looks like “enough” wallpaper, but even a small miscalculation means running one strip short right before the finish line — and if the replacement roll comes from a different dye lot, that mismatch can be visible under certain lighting even when the pattern itself lines up correctly.
And don’t overlook how you store extra rolls before starting. Material left in a hot car trunk or a freezing garage overnight can warp slightly, making it noticeably harder to work with once you finally unroll it on installation day.
Frequently Asked Questions
Is stick and peel wallpaper actually as easy as it looks online?
The application itself is simple, but wall prep and patience matter more than the marketing suggests. Rushing either step is where most disappointing results come from.
Can stick and peel wallpaper go over old wallpaper?
Only if the existing wallpaper is fully intact, smooth, and not vinyl-coated in a way that blocks adhesion. Testing a small swatch first is always the safer move.
How long does stick and peel wallpaper realistically last?
Most quality rolls hold up two to five years depending on material and room conditions. Humidity and direct sunlight are the two biggest factors in how fast that timeline shortens.
Does stick and peel wallpaper work in bathrooms?
Some moisture-resistant vinyl versions handle bathrooms fine, but standard rolls can lift within weeks in poorly ventilated spaces. Always check the product’s moisture rating before buying for that room.
Will removing stick and peel wallpaper take the paint off with it?
Not usually, provided the paint was fully cured before installation and removal happens slowly at a low angle. Rushed removal on undercured paint is the main cause of paint lifting.
Wrapping It Up
Stick and peel wallpaper deserves a better reputation than it usually gets in casual conversation. It’s not a flimsy sticker, and it’s not a miracle either — it’s a genuinely useful middle ground between the permanence of paint and the commitment of traditional pasted wallpaper, and it rewards the same care any wall treatment does. The difference between someone who loves the result and someone who’s disappointed almost always comes down to a handful of specifics: whether the wall was actually clean and cured, whether the material matched the room’s humidity level, and whether the first strip went up patiently instead of rushed.
I’ve watched this material fail, usually from skipped prep or an incompatible wall surface nobody checked first. I’ve also watched it turn a forgettable rental bedroom into something that looks genuinely designed, without a contractor, a paint sprayer, or a weekend lost to fumes. Both outcomes are real, and pretending only one of them exists does a disservice to anyone trying to decide if this is worth their time.
If you’re on the fence, the honest answer is that stick and peel wallpaper is worth trying — but only if you treat wall prep and material selection with the same seriousness you’d give an actual paint job. Skip that seriousness and you’ll likely be dealing with lifted edges within a couple of months. Take it seriously, follow through on the details covered here, and stick and peel wallpaper can hold up for years while still giving you the freedom to change your mind whenever you’re ready. That flexibility, not the promise of effortlessness, is the actual case for stick and peel wallpaper.