

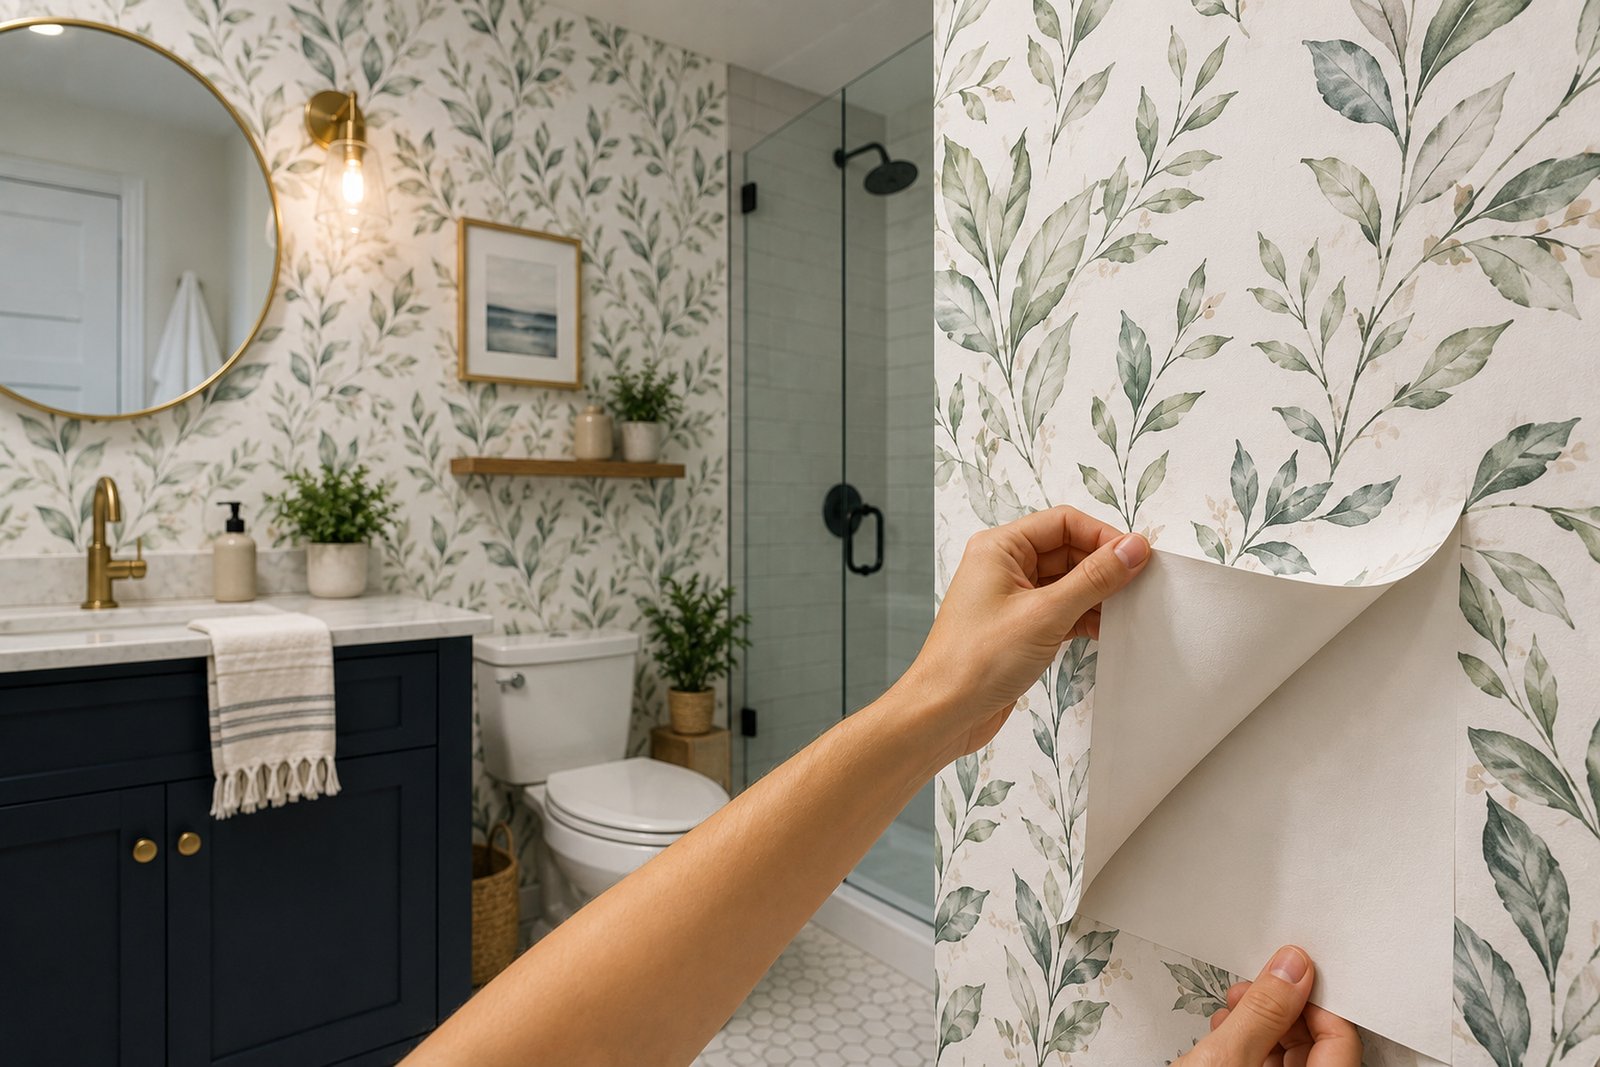
Three years ago, I stuck peel and stick bathroom wallpaper onto my own shower wall fully expecting a refund request within the week — glue residue, curling edges, the whole disaster I’d pictured while standing in the hardware aisle. None of that happened. My cousin cornered me at a family dinner last month wanting to know if peel and stick bathroom wallpaper genuinely survives a daily shower routine, or if that claim only exists to move inventory.
Reasonable thing to wonder — I doubted it too, once. What’s below isn’t a sales pitch dressed up as advice. It’s three bathrooms’ worth of scraped knuckles, one ruined roll, and a bunch of small lessons nobody bothered mentioning to me first.
Untangling What “Peel and Stick” Actually Involves
Paste-and-brush wallpaper demands a kind of patience most Saturday projects quietly abandon halfway through. Strip the backing, press the sheet, walk away — that’s the entire pitch of the peel-and-stick version, minus the mess.
Almost suspiciously simple, and there’s a small catch buried in there. Contact pressure is what actually activates the glue, meaning a careless, half-hearted press leaves you with bubbles staring back within days.
Bathrooms throw in a wrinkle most rooms never deal with — actual steam, thick enough to fog a mirror. A kitchen splashback never breathes in that kind of daily humidity the way a shower-adjacent wall does before most people finish their coffee.
Finish type varies more than shoppers expect walking in. Some rolls carry a soft, cloth-like matte surface; others go slick and glossy under your palm. Glossy tends to win in a bathroom purely because wiping it down takes seconds instead of minutes.
Prices swing wide too — cheap patterned rolls hover near fifteen dollars, while textured or designer prints climb past sixty without much effort. One roll typically stretches across twenty-eight to thirty-five square feet, though that number shifts brand to brand.
The Steam Problem Everyone Conveniently Skips
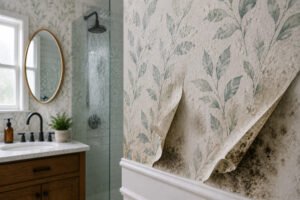
Sales copy rarely mentions this part directly. Humidity doesn’t just float around a room — it burrows into whatever’s mounted on the walls, adhesive included.
Straight from the source, the EPA’s professional mold prevention guidance says something worth tattooing on your bathroom door: flip the exhaust fan on, or crack a window, every time you shower, and moisture never gets the chance to pile up in the first place. That one small habit outperforms any premium adhesive on the shelf.
Forget the fan and even top-shelf wallpaper starts peeling at the seams before the season’s out — learned that particular lesson in a rental unit where the fan barely made a sound worth noticing.
Hold indoor humidity near a sane number, under sixty percent ideally, and seams stay put much longer than expected. A cheap meter from any hardware counter runs less than a single roll and tells you precisely where things stand.
Worth flagging a subtler wrinkle here too: cold surfaces invite condensation independent of overall humidity levels. A wall backing onto an unheated space, or a window that fogs up on cue, needs extra attention beyond whatever the rest of the room requires.
Some installers brush on a thin moisture-blocking primer first, specifically over walls known for sweating. Extra step, sure — cheap insurance compared to redoing an entire wall six months down the line.
Choosing Material That Won’t Blister in the Steam
Not every roll marketed as bathroom-friendly actually earns that label, and this catches people off guard constantly.
Vinyl and vinyl-coated stock shrug off humidity in a way paper-based rolls simply don’t when it comes to peel and stick bathroom wallpaper — a gap expert-tested moisture material picks from This Old House confirmed after running several brands through actual testing. Paper-based peel and stick belongs on a dry bedroom accent wall. Drop it in a bathroom and it sulks fast.
Polyester blends sit somewhere in the middle ground — reasonably moisture-resistant, a touch pricier, worth the extra cost if the bathroom sees heavy daily traffic from a full household.
Thickness matters more than most shoppers assume walking into the store. Thin, discount rolls tear mid-install and telegraph every dent or bump hiding underneath. Spend a little more here — the difference shows up immediately once it’s on the wall.
A fast quality gut-check before buying: hold a sample toward a window if the store allows it. Thin sheets let light bleed through fairly evenly, a decent sign it’ll expose wall texture and old paint seams the moment it’s mounted.
Brand name matters less than whatever material’s actually printed on the packaging. A five-star-reviewed brand still sells paper stock sometimes, and paper stock still has no business near a shower wall regardless of review count.
Texture options have genuinely improved lately — embossed vinyl mimicking grasscloth or linen weave has gotten convincing enough to fool guests until they run a hand across it. Worth a look if flat gloss feels too clinical for the space.
Prepping the Wall Before Touching a Single Sheet
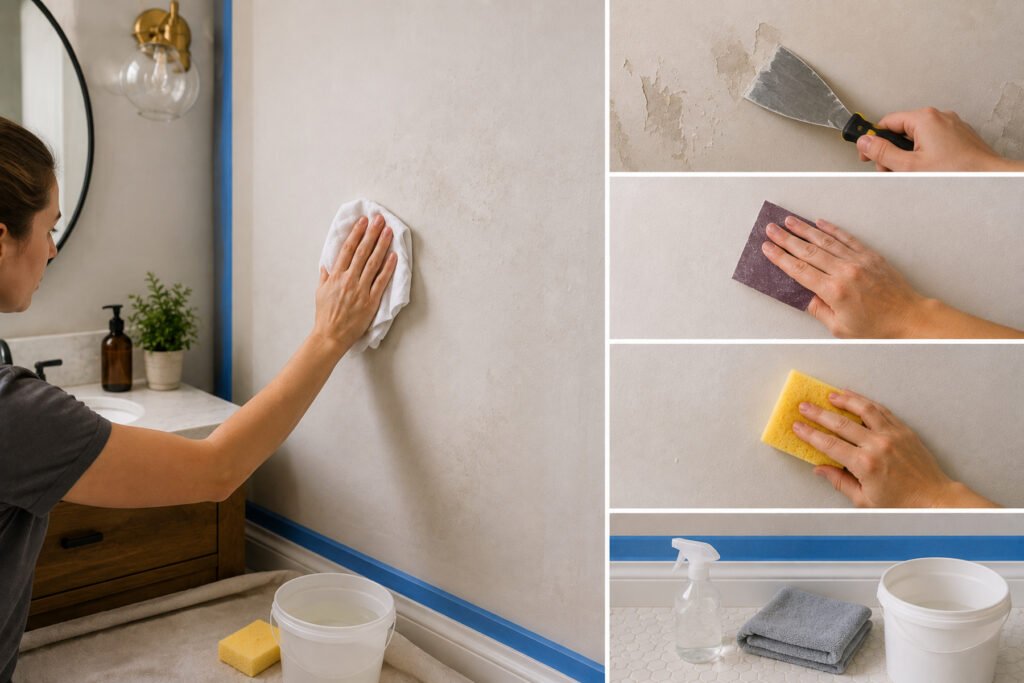
Prep work is the step everyone tries to rush past, and ironically it’s the one deciding whether this holds three years or three months.
Wash the wall properly first — not a passing swipe with a rag. Soap film, dust, and leftover cleaning-spray residue quietly wreck adhesion in ways that only surface weeks later, long after you’ve forgotten the shortcut you took.
Fresh paint? Give it weeks. Several, not one — the cure time is non-negotiable if you want this to actually last, and honestly, rushing that clock is probably what kills more of these projects than anything else on this whole list.
Dents. Hairline cracks. That old nail hole from whatever hung there before. Deal with all of it first — patch, sand, move on — because none of it fixes itself once wallpaper’s covering it up.
Should You DIY This or Just Pay Someone?
Solo installs work for most people, when it comes to peel and stick bathroom wallpaper. That’s kind of the whole point of the format existing — why would anyone bother if a pro was still required?
Two to three hours, roughly, for one accent wall on a first try. Longer if the pattern’s fussy about matching up at the seams — nobody warns you about that part until you’re mid-panel squinting at a misaligned print. Full-room jobs eat a whole weekend once fixtures get involved. Second wall always goes quicker than the first, for what it’s worth — the learning curve barely counts as one.
Hiring an installer typically runs two to five dollars per square foot on top of materials, a cost that climbs fast across a whole bathroom. For most peel and stick jobs, that fee buys convenience rather than solving an actual problem.
Where hiring makes genuine sense: bathrooms full of odd angles, pricey designer rolls where a botched cut would sting, or simply a calendar with zero free weekends in sight.
Budgeting for a Real Bathroom Project
Costs here tend to surprise people in both directions, honestly — sometimes lower than braced for, sometimes not.
Forty to sixty square feet — call it a modest powder room — and two or three rolls usually covers it. Do the math on mid-tier vinyl, fifteen to thirty a roll, and you’re looking at thirty to ninety bucks total. Not bad, all things considered.
Bigger bathrooms or wraparound coverage can eat through five to eight rolls easily, especially with a repeating pattern that demands extra material for alignment. Toss in a squeegee, a level, and a sharp blade if your toolbox is missing them — another fifteen to twenty-five dollars, one time only.
The Actual Install, Step by Step
| Step | What to Do | Why It Matters |
| 1. Measure twice | Measure wall height and width, add 10-15% extra | Prevents running short mid-panel |
| 2. Mark a plumb line | Use a level to draw a vertical guide | Keeps the first panel straight |
| 3. Peel in stages | Pull backing off a few inches at a time | Avoids trapped air bubbles |
| 4. Smooth from center | Squeegee outward toward the edges | Pushes air and bubbles out |
| 5. Trim excess | Run a sharp blade along the edges | Clean, professional finish |
| 6. Reinforce seams | Roll seams firmly at install, again at 24 hours | Prevents edge lifting later |
None of this calls for a contractor’s van full of gear. A squeegee, a level, and one sharp blade cover nearly the whole job.
Placement That Doesn’t Scream “Rental Fix”
Wrapping the entire room isn’t mandatory, and honestly it’s not always the better-looking route anyway.
Covering only the bottom half of a wall, with plain paint finishing the top, reads as far more deliberate than most people assume going in. Less material sits near the spray zone too, which helps longevity.
An accent wall framing the vanity mirror does enormous visual work for minimal material spend. It’s the one wall guests actually register, and usually the one sitting furthest from direct water.
If lining up a busy pattern sounds like a headache, a bold solid or a soft texture sidesteps the whole issue — no seams to match, no rolls wasted chasing a repeat.
For more layout inspiration built specifically around tighter bathroom footprints, this bathroom wallpaper style guide walks through options that hold up in smaller spaces.
Colors and Prints That Don’t Age Badly
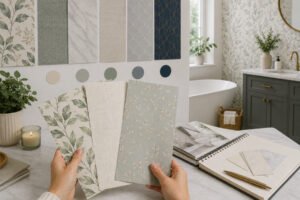
Chasing whatever’s trending is tempting, especially scrolling through endless bold prints online. Worth resisting a little, though, since bathrooms get redone far less often than living rooms.
Smaller-scale prints generally suit compact bathrooms better than oversized florals or chunky geometrics — big patterns can make a tight powder room feel smaller once it’s fully wrapped.
Neutral, texture-driven bases — grasscloth-style weaves, soft marbled effects — tend to outlast louder color trends by a wide margin, and they play nicely with whatever fixtures get swapped in down the road.
That said, a small bathroom happens to be exactly the low-stakes spot where a riskier pattern makes sense. Removability is the built-in safety net — regret a print after six months and swapping it costs an afternoon, not a renovation budget.
The Toilet, the Sink, and Every Awkward Corner Between Them
First-timers hit a wall — pun sort of intended — right around the toilet tank or a pedestal sink. Happens to nearly everyone.
Cut panels oversized first, trim gradually once positioned — trimming too soon leaves zero margin if the wall isn’t perfectly square, and let’s be honest, most aren’t.
Keep it set back roughly six to eight inches from direct shower spray unless the specific product carries a wet-zone rating. That single buffer wipes out most early edge-lifting complaints before they start.
Outlets, switch plates — same drill every time. Cover off. Wallpaper straight over the hole like it isn’t there. Then a small X cut, flaps folded back, trimmed flush. Way cleaner than trying to scissor around a plate that’s still screwed in.
Behind a toilet tank specifically, split the panel into two narrower strips instead of wrestling one oversized piece around an awkward curve. Takes longer. Worth it, though — the seam vanishes behind the tank, and not one guest will ever know a shortcut wasn’t taken.
How Long Peel and Stick Bathroom Wallpaper Actually Lasts
Three to five years, roughly, for a properly hung roll of peel and stick bathroom wallpaper on a wall that got prepped right. I’m not pulling that number from nowhere — it’s tracked pretty consistently across every install I’ve either done myself or watched a friend struggle through.
What kills it early, almost always? Steam sneaking under a seam that never fully bonded. Or moisture trapped underneath from a job that got rushed. Both entirely preventable, honestly, if patience wins out over impatience for once.
Cleaning matters more than people think. Damp cloth, barely wet, does the job most days. Skip the harsh sprays — abrasive scrubbing wrecks that vinyl coating faster than any amount of daily steam ever could on its own.
Sunlight’s a quieter factor, easy to forget about. A big bathroom window, years of direct sun hitting it, and bold colors start fading noticeably sooner than they would on a shaded wall. North-facing rooms just age better, color-wise — no real way around that one.
Peel and Stick Versus Traditional Wallpaper
| Factor | Peel and Stick | Traditional Wallpaper |
| Installation time | A few hours, DIY-friendly | Often a full day, skill-dependent |
| Removability | Peels off cleanly, renter-friendly | Can damage drywall on removal |
| Moisture resistance | Strong with vinyl options | Varies, often needs sealant |
| Cost per roll | Generally comparable or slightly higher | Generally comparable or slightly lower |
| Repositioning | Possible during install | Rarely possible once pasted |
Neither format wins across the board. Renters and first-time DIYers usually lean peel and stick. Homeowners chasing a specific luxury finish for the long haul sometimes still go traditional.
Mistakes That Ruin Peel and Stick Bathroom Wallpaper Fast
Most of what follows comes from watching friends stumble through this, plus a couple I own personally and won’t dress up otherwise.
Installing over a damp or freshly painted wall tops the list every time. Patience saves months of grief down the road — rushing this one step nearly guarantees an early failure.
Skip the seam roller and pay for it later. Press hard at install. Press again at 24 hours. Once more at 48. Edges curl if you don’t — that’s just how it goes.
Cheapest roll on the shelf? Tempting, sure, but it usually backfires. Thin material tears the second you’re mid-application, every wall bump shows right through it, and suddenly a quick Saturday job turns into a redo nobody had time for.
Ignoring bathroom ventilation entirely is the quiet killer nobody blames until it’s too late. No wallpaper, however carefully installed, outlasts constant unmanaged steam forever.
A less obvious slip: skipping a lighting test before ordering the full amount. Bathroom lighting, cooler LED fixtures especially, can shift how a color reads compared to how it looked on a screen or under showroom bulbs. Order a swatch first if the retailer offers one — cheap insurance against a much bigger regret.
Busy prints and rushed pattern-matching don’t mix well. Lay two panels side by side first — no glue yet, just checking. Does the repeat actually line up? Takes five minutes, saves you an entire roll if the answer’s no.
Bathroom-Safe Materials at a Glance
| Material | Moisture Resistance | Best For |
| Vinyl | High | Full bathroom walls, near shower zones |
| Vinyl-coated | High | Everyday bathroom use, easy cleaning |
| Polyester blend | Moderate to high | Heavy-use family bathrooms |
| Paper-based | Low | Powder rooms, dry accent walls only |
Frequently Asked Questions
Does peel and stick bathroom wallpaper hold up near a shower, honestly?
Yes — as long as it’s vinyl or vinyl-coated and the wall got prepped properly first. Paper-based rolls struggle badly with high moisture, so material matters way more than the brand name printed on the box.
How long does peel and stick bathroom wallpaper realistically last?
Three to five years on a well-prepped wall with decent airflow. Weak prep or a bathroom missing a working exhaust fan can shrink that lifespan down to months instead.
Is peel and stick bathroom wallpaper a safe bet for renters?
Absolutely — that’s a huge part of the appeal. It peels off cleanly without damaging paint or drywall underneath, unlike pasted wallpaper, which often rips wall material away with it.
Should I seal peel and stick wallpaper in a bathroom afterward?
Usually not, assuming you’re using a vinyl or wet-area-rated product to begin with. Cheaper paper-based rolls occasionally benefit from a clear sealant, though results vary quite a bit by brand.
What actually causes bubbling or lifting on this kind of wallpaper?
Installing over a damp, dirty, or freshly painted wall causes most failures. Trapped air during application and excess humidity from weak ventilation also contribute significantly over time.
How close can this wallpaper safely sit next to a shower or tub?
Stay six to eight inches back from direct spray unless the product is explicitly rated for wet zones. That buffer alone prevents the majority of early edge-lifting and seam trouble.
Can peel and stick wallpaper go directly over bathroom tile?
Generally, no. Grout lines create an uneven surface that adhesive can’t grip properly, so smooth drywall, plaster, or a painted surface works far better than tile ever will.
How much extra material should I order for a bathroom job?
Order roughly 10 to 15 percent beyond your measured wall area. That cushion covers trimming, pattern-matching, and mistakes, without hunting down a matching dye lot from a different batch later.
Wrapping This Up
Worth the effort or not? After three bathrooms and one genuinely rough first attempt, my honest take lands firmly on yes — with a few strings attached. Nail the material choice and everything downstream stops feeling intimidating.
Vinyl or vinyl-coated wallpaper, hung on a clean, fully dry wall, with a working fan running through every shower, holds up for years without much fuss. Drop any one of those three conditions and the timeline collapses fast, sometimes down to a handful of disappointing months. Short list of requirements, honestly, none demanding special skill — just a bit of discipline nobody enjoys exercising on a Saturday when slapping the panel up and walking away feels far more tempting.
What caught me off guard wasn’t the install itself — that part really is as painless as advertised. It was how much the small habits mattered once the wallpaper was already up.
Running the fan. Wiping down condensation instead of letting it linger. Pressing a loose seam back into place the moment it’s spotted instead of putting it off for a month.
None of that demands special skill, only consistency. A rushed weekend job with zero follow-up care disappoints regardless of how good the wallpaper itself happens to be. A slower, more deliberate install paired with basic upkeep afterward tends to outlast expectations by a wide margin.
If one thing’s worth carrying away from all this, it’s that this wallpaper rewards patience on both ends — patience during prep, patience during the unglamorous upkeep nobody enjoys discussing. Nail those two pieces and the actual pattern choice becomes the easy part. Start small if nerves are an issue. Test instincts on something low-stakes before committing the whole room, then adjust once you’ve watched how your particular bathroom’s humidity actually behaves.
One closing thought, since it’s the question that follows the “does it really work” one most often: worry less about color and more about prep work. A slightly imperfect pattern on a properly prepped wall will always outlast a gorgeous print rushed onto a damp one. Handle the boring part first, and the fun part — picking something worth waking up to every morning — gets to stick around a whole lot longer than it otherwise would.